
|
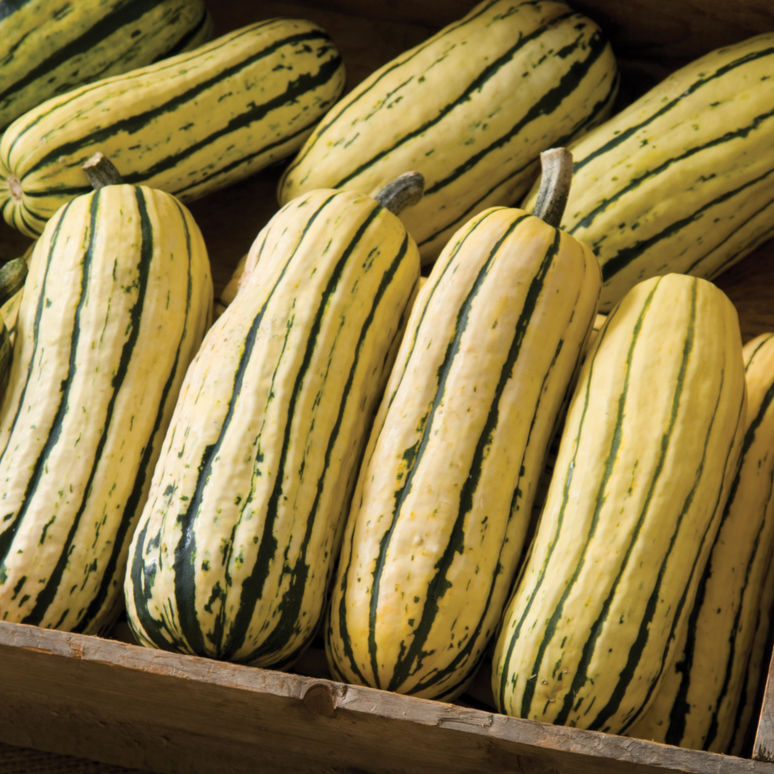
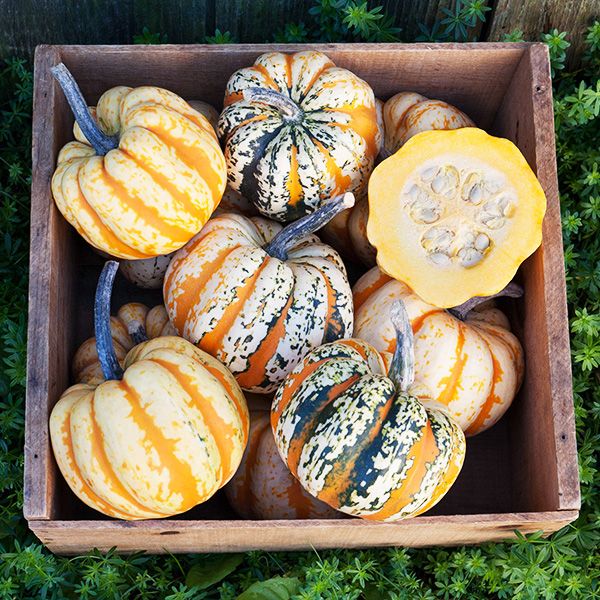
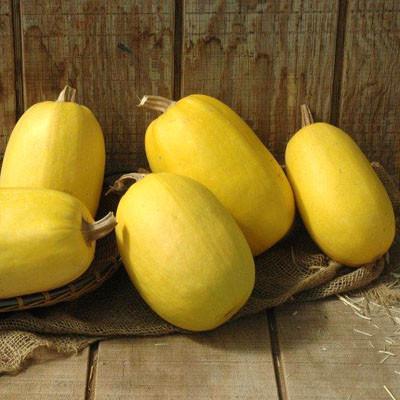
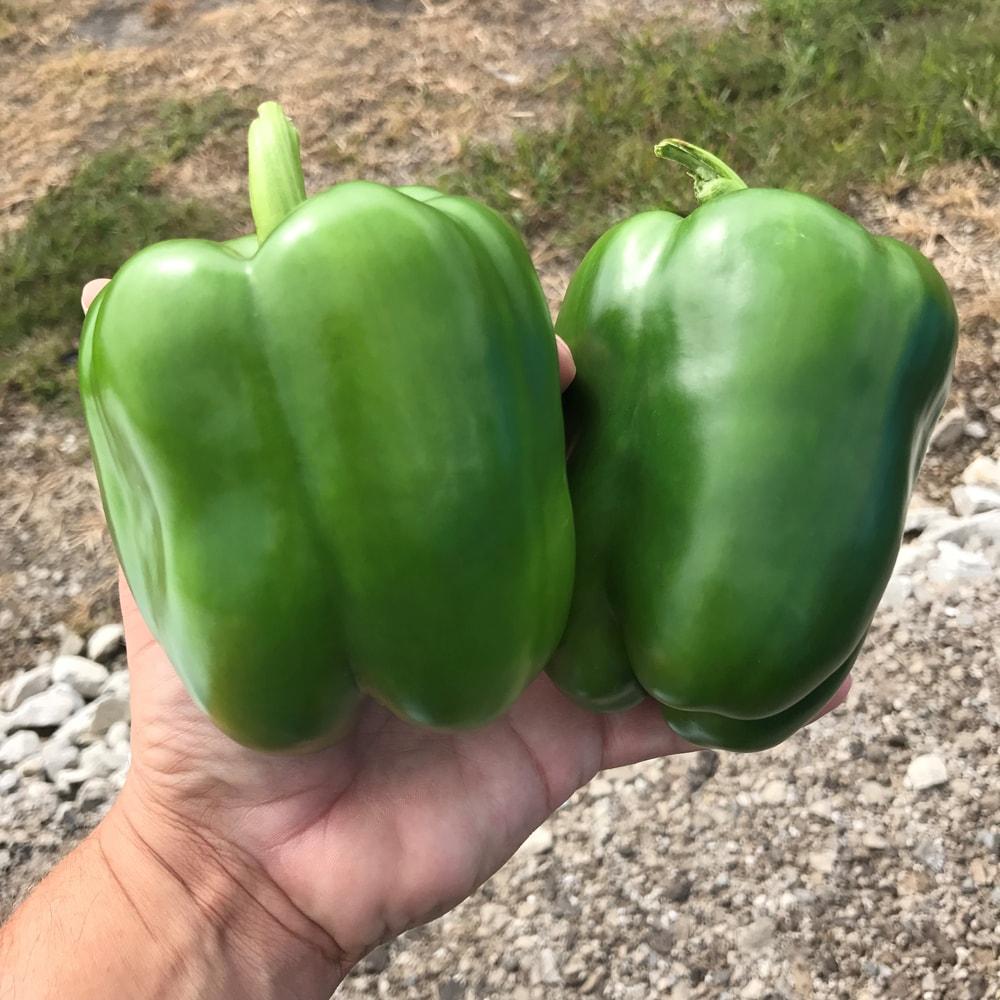
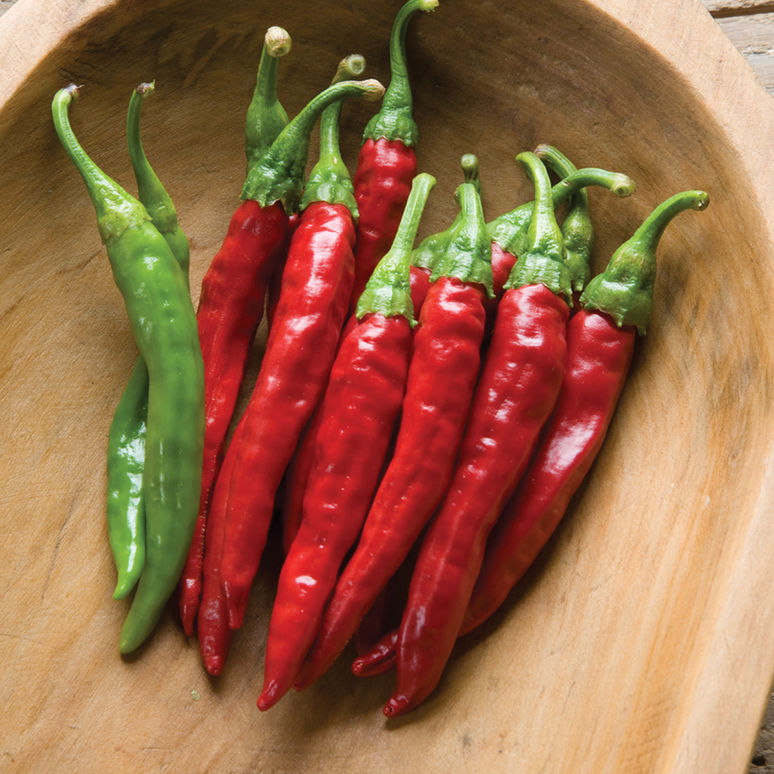
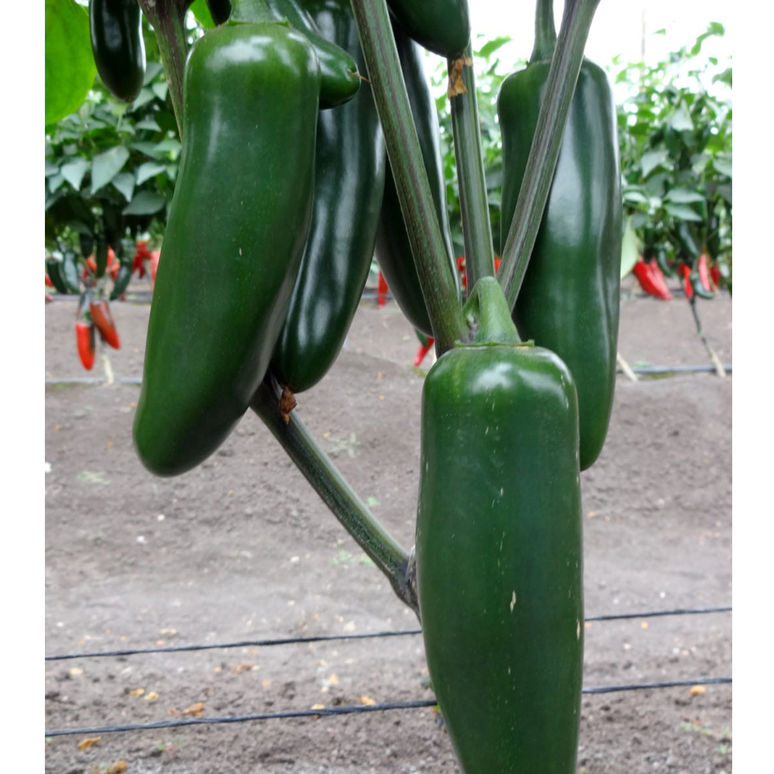
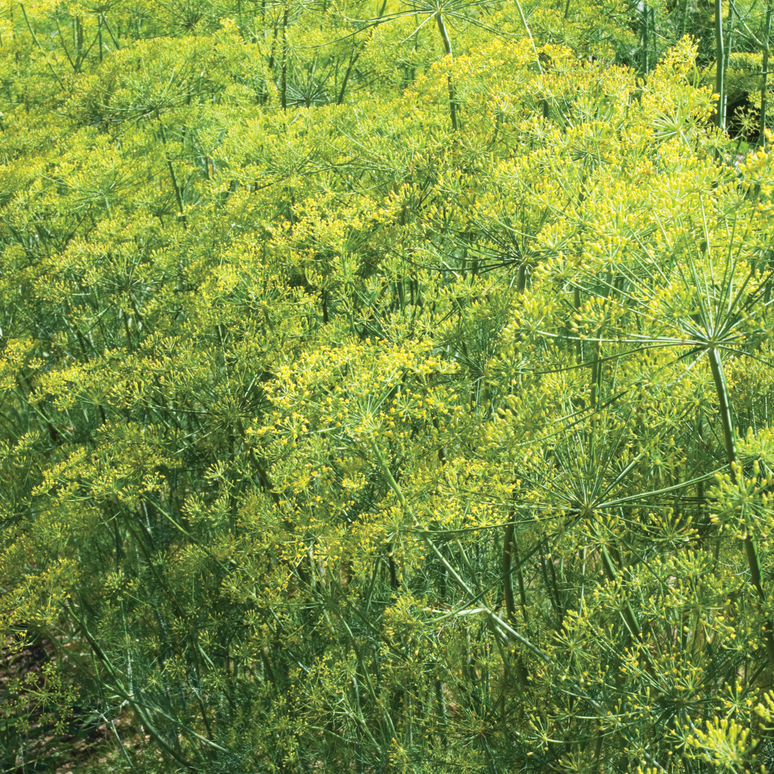
You asked and we listened, new winter squash varieties are coming to the fall harvest! Bush Delicata Squash We've never grown this variety before and we're pretty excited! The cylindrical, 8" long fruit has a bright yellow-orange flesh. The texture is smooth with a mild nutty flavor and reminiscent of a sweet potato. Primavera Spaghetti Squash This is a uniform variety with canary yellow skin color at maturity. Bake with your favorite red sauce and a little parmesan, mangia! Festival Acorn Squash The fruit is deeply ribbed and striped with a wide, slightly rounded bottom. Flesh is peach-colored, similar to an acorn squash but with superior sweet flavor and texture. Three new varieties of peppers to spice up your weekly menu! Skyhawk Pepper This variety is sweet and green, has thick walls and a traditional block shape. It's perfect for summer salads, fajitas, and stuffed peppers. Red Rocket Pepper This cayenne chile pepper is tapered, thin-walled, and about 5 to 6" long. It dries quickly to a bright crimson red. These dried fruits have tender flesh which is nice and soft when cooked. Jedi Pepper The largest jalapeno offering! The fruit averages 4 to 4 1/2" and are slow to check (to show small cracks in skin). A great addition to any menu requiring heat. So many of you have asked about herbs and again, we listened! Everleaf Basil 2 to 3" long glossy and cupped leaves with a classic Genovese Basil aroma. Dark Opal Basil Purple with 20% variegated green tips make this variety colorful and unique. It's sweet and spicy, slightly stronger anise flavor than the common green sweet basil, with mild ginger undertones and a robust aroma. Bouquet Dill For all you pickling lovers! Edible seeds and greens with a flavor profile of fennel, anise and celery, with warm, slightly bitter undertones. A popular addition to sauces and a must for making Hatfield Pickles. Stay tuned for updates as we will be adding thyme, oregano, and more!
We hope you enjoy these new products as much as we will enjoy growing them. As always, we love your feedback, please share your wish list, ideas, and/or comments below. Thanks for reading!
0 Comments
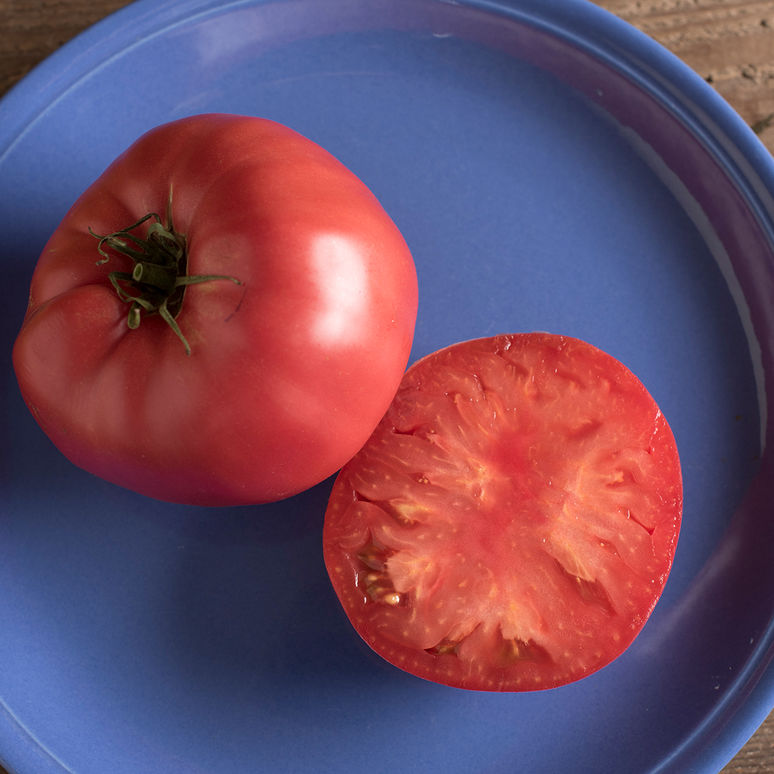
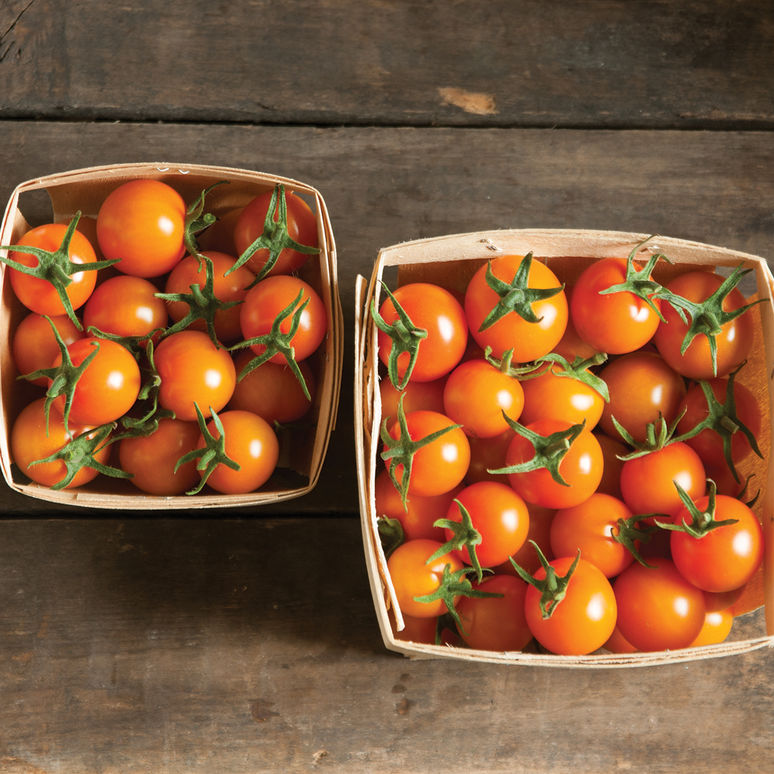
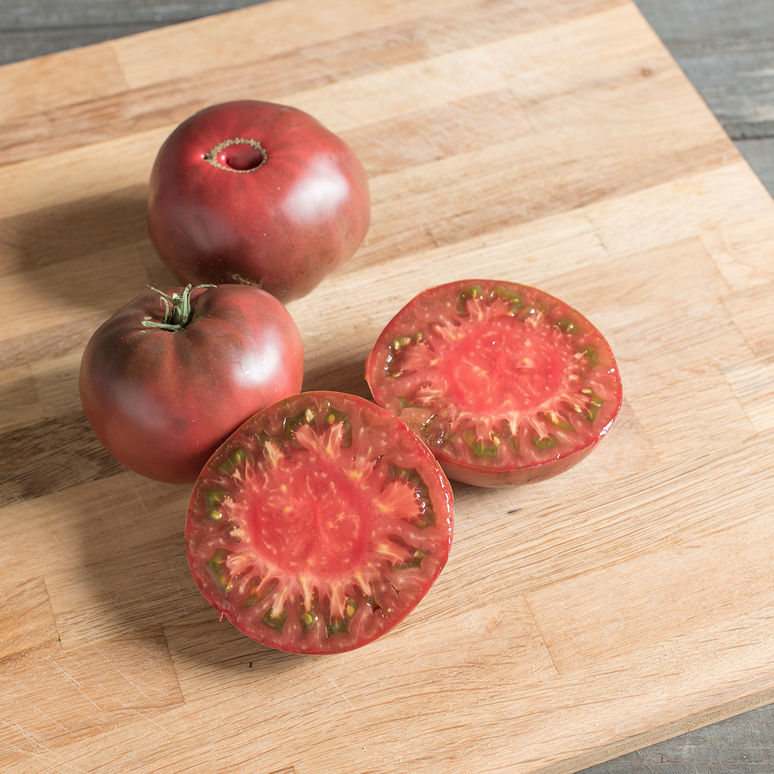
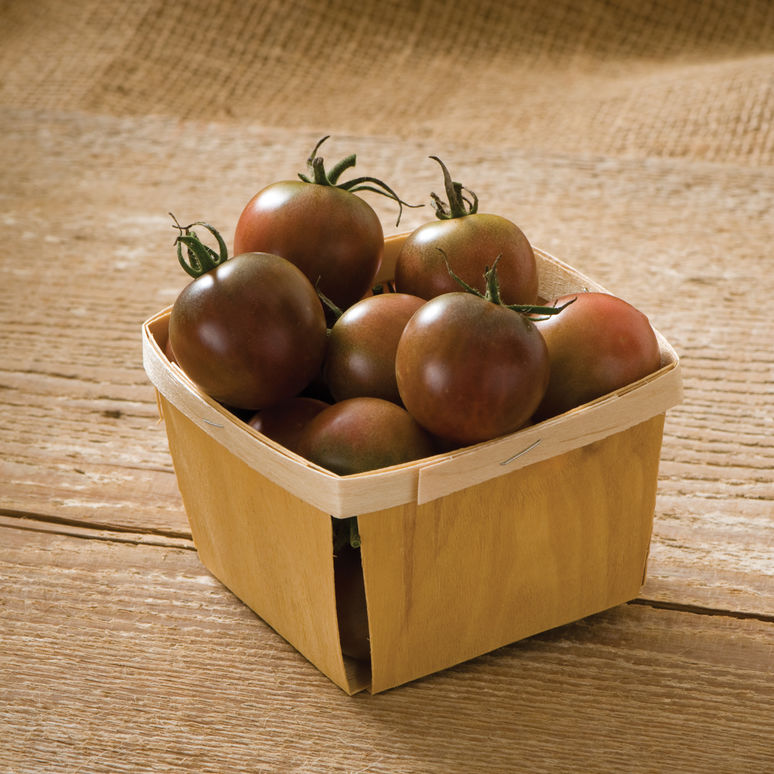
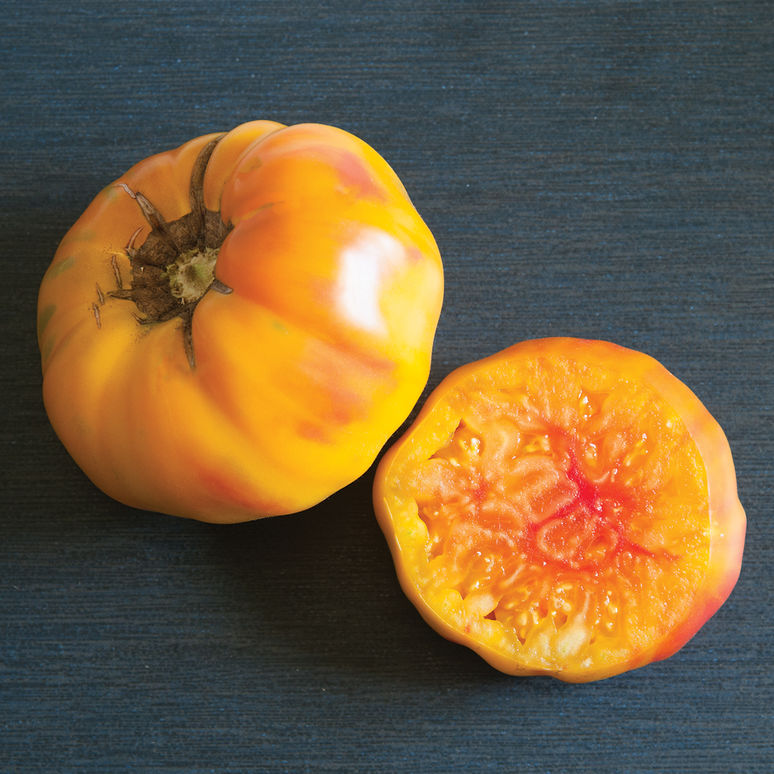
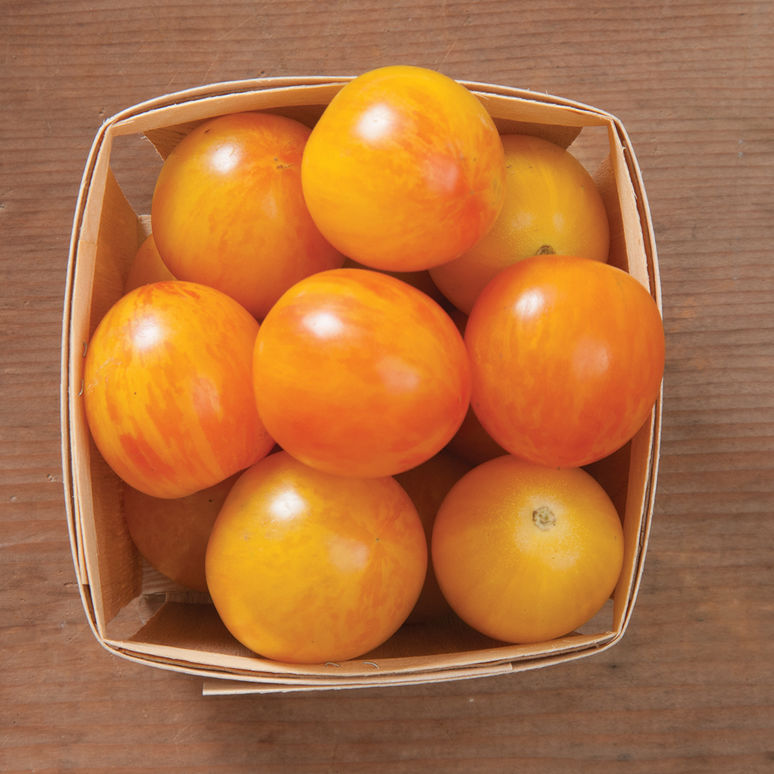
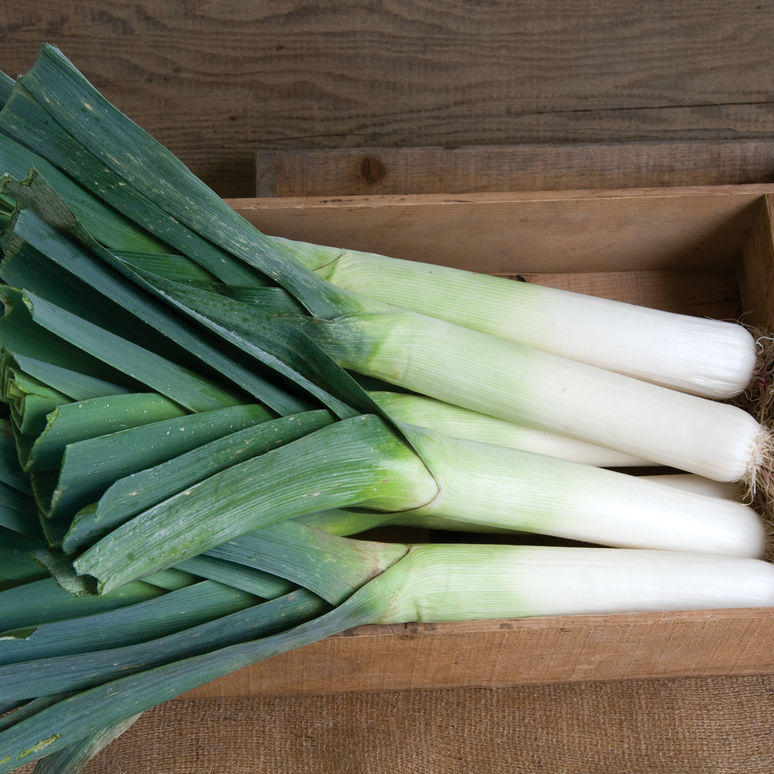
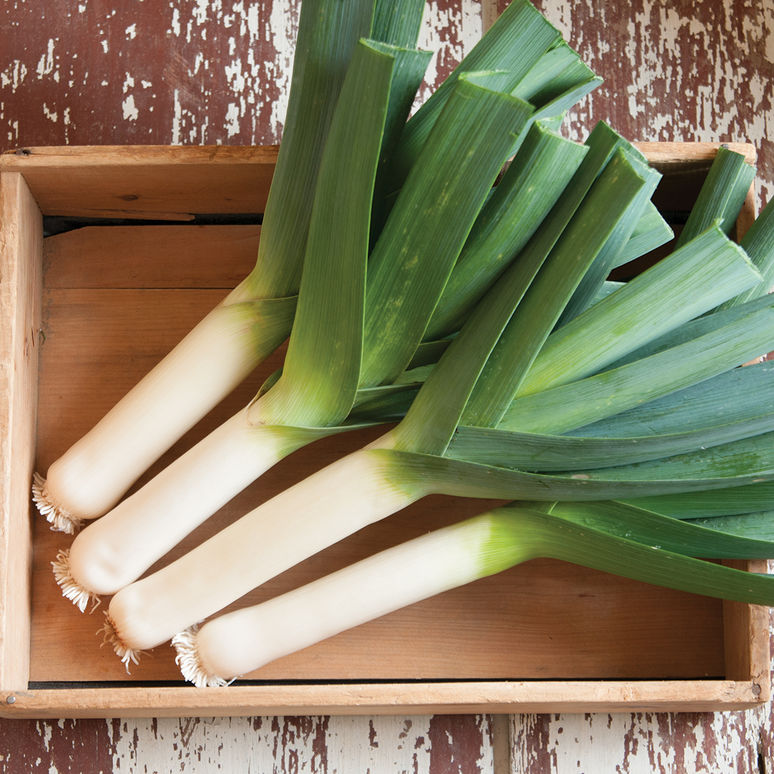
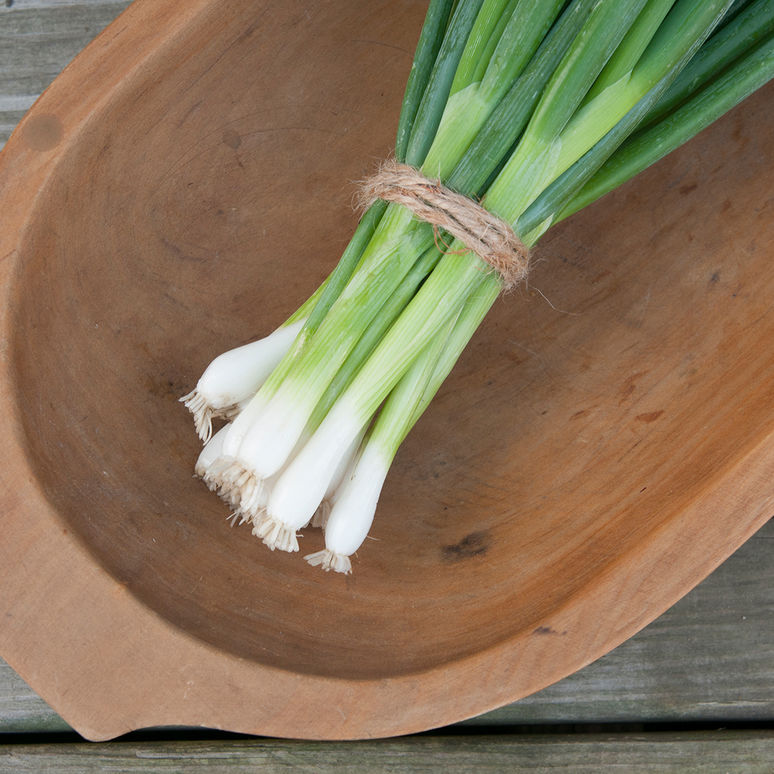
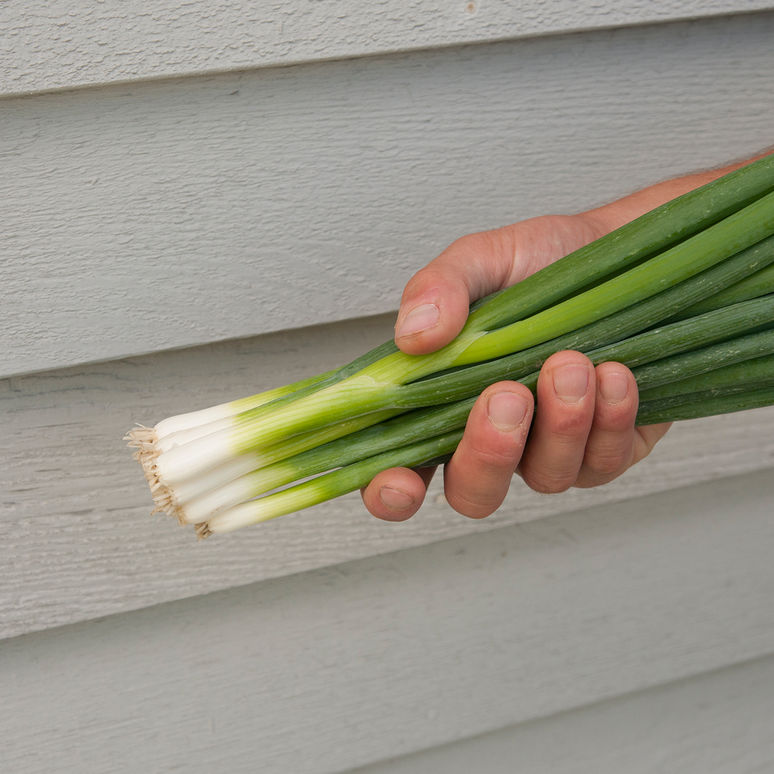
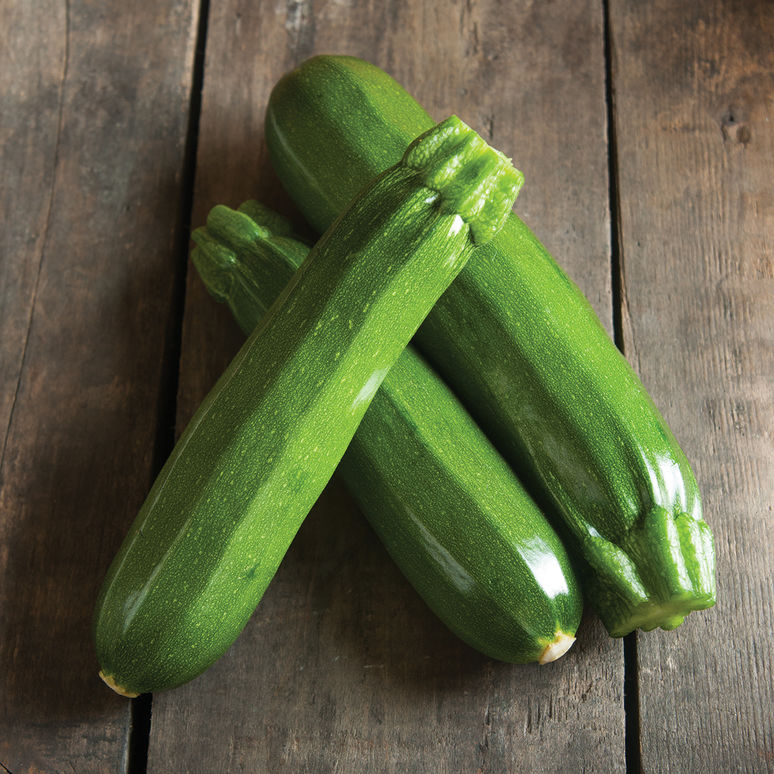
TOMATOES! TOMATOES! TOMATOES! This year we are introducing a plethora of new tomato varieties; any where from large juicy heirlooms to the sweet little grapes! Cherokee Purple Heirloom Tomato A famously rich flavor and meaty texture make this a colorful favorite among heirloom enthusiasts. Brandywine Heirloom Tomato This variety has a luscious heirloom flavor and described as very rich, loud, and distinctively spicy. The fruit is often large, over 1lb, has a deep pink skin, and smooth red flesh. Striped German Heirloom Tomato This variety produces a flat, medium to large fruit, with a yellow and red meaty flesh. The marbled interior looks beautiful sliced! Sun Gold Cherry Tomato "Candy Tomatoes" as I like to call them are bright tangerine-orange and sun-kissed sweet. Black Cherry Tomato This variety has a dramatic flavor very similar to heirloom tomatoes and compliment chop salads perfectly. Sunrise Bumble Bee Tomato This tomato is bite-sized with red stripes and pink interior marbling. A gorgeous combination of yellows and reds, inside and out. Excellent sweet and tangy flavor. Purple Top Turnip An awesome addition to our fall display! This turnip is popular because of its shape, rich taste and attractive appearance. Leek We are introducing two varieties, Megaton and Takrima. Cousins to the onion, both have medium blue-green foliage with refined bright white shanks. Mild in flavor and a perfect compliment to your kitchen. Scallions Two different varieties to choose from! Nabechan and Evergreen Hardy White, both have sweet and complex flavors. Evergreen Hardy White will compliment the fall harvest and will overwinter. In the summer squash category we are introducing spineless varieties making picking a little easier! Spineless Beauty Squash The squash is a favorite late season variety producing big yields of uniform, long, cylindrical, and medium green fruit. Excellent steamed, sautéed and juiced, a staple in a summer kitchen. Noche Zucchini Squash An attractive, dark-green, cylindrical squash that is earthy and mildly sweet. Join us next week for Part 3 of the 2018 Season Preview!
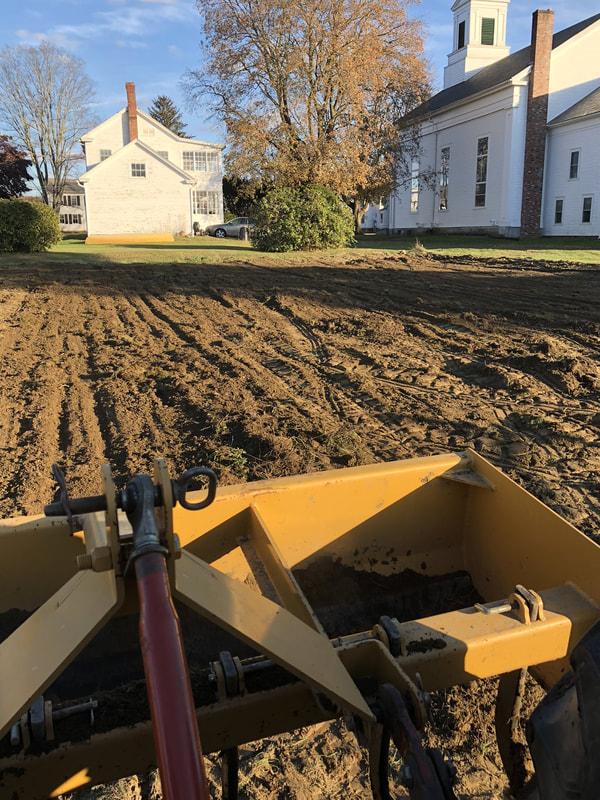
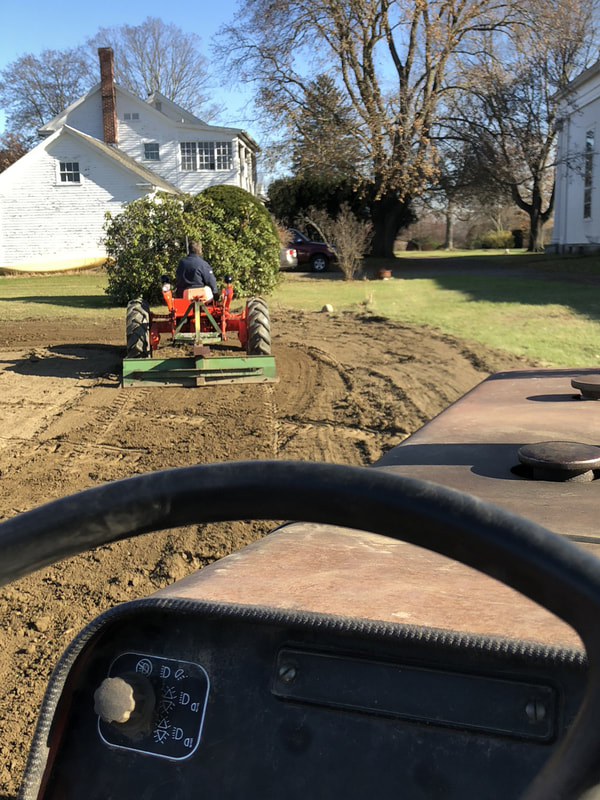
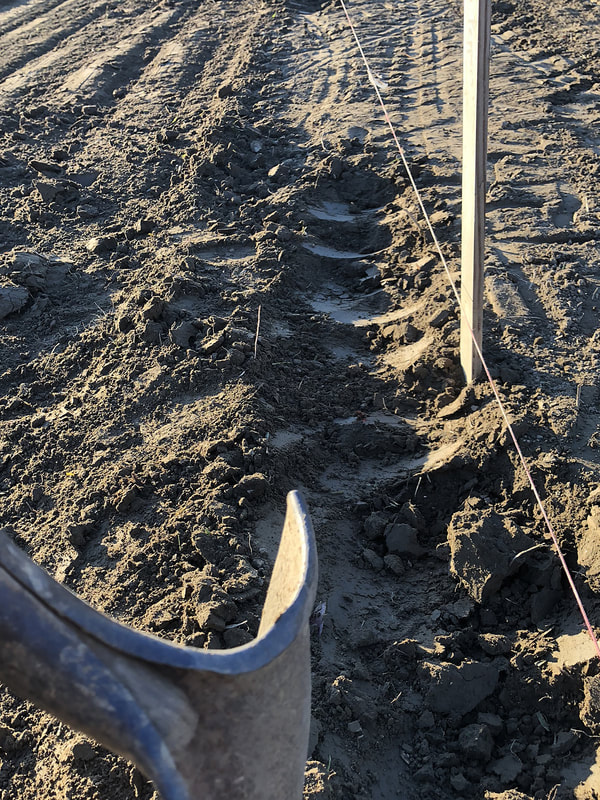
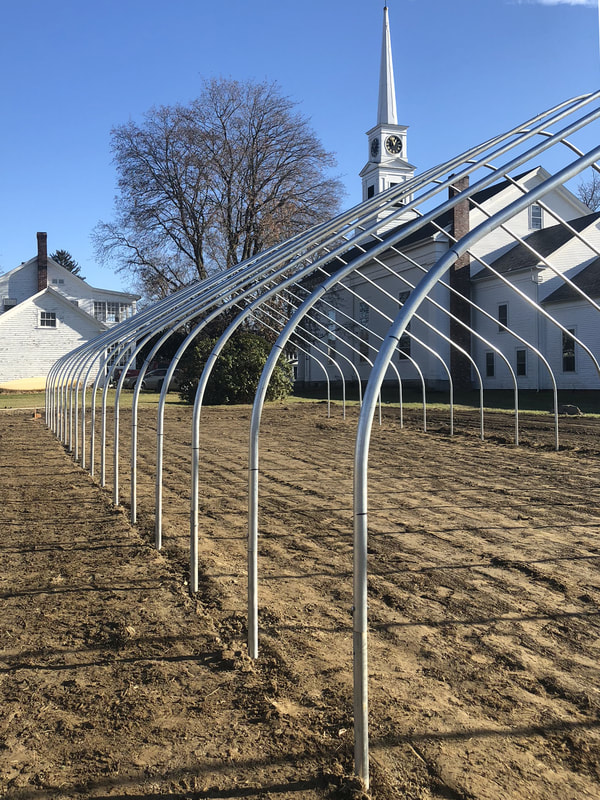
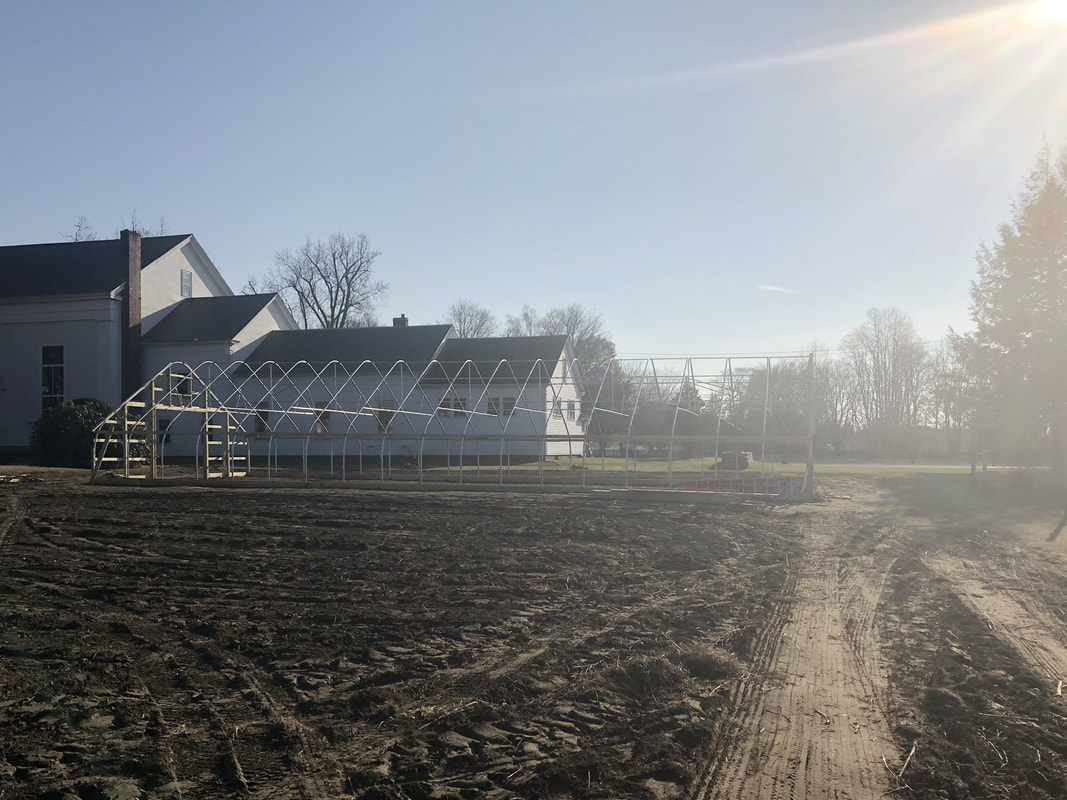
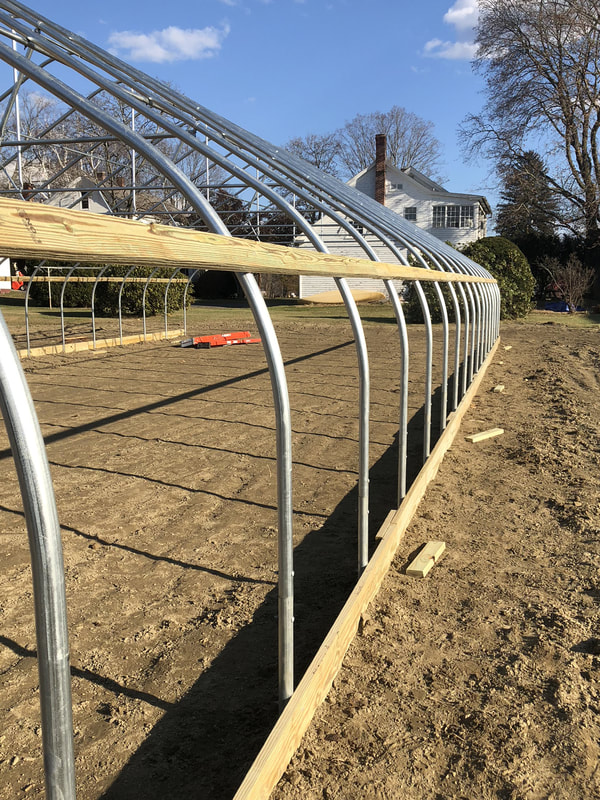
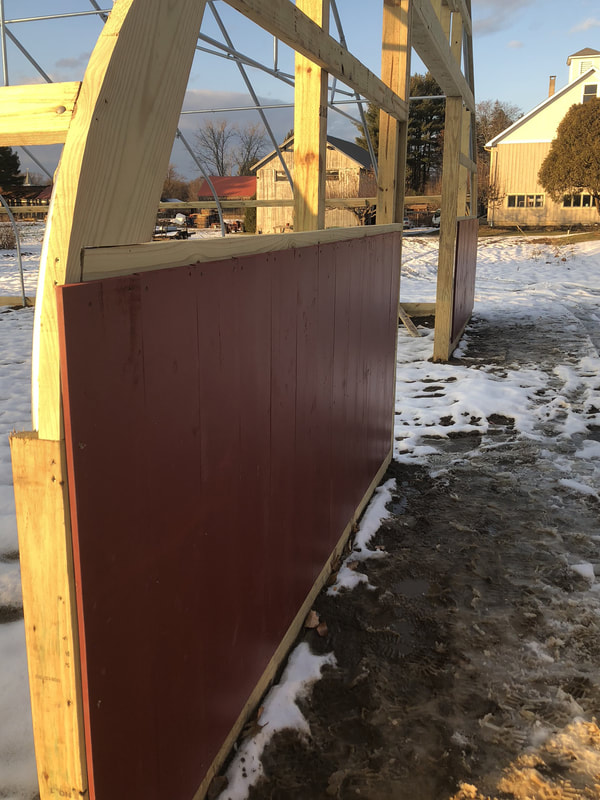
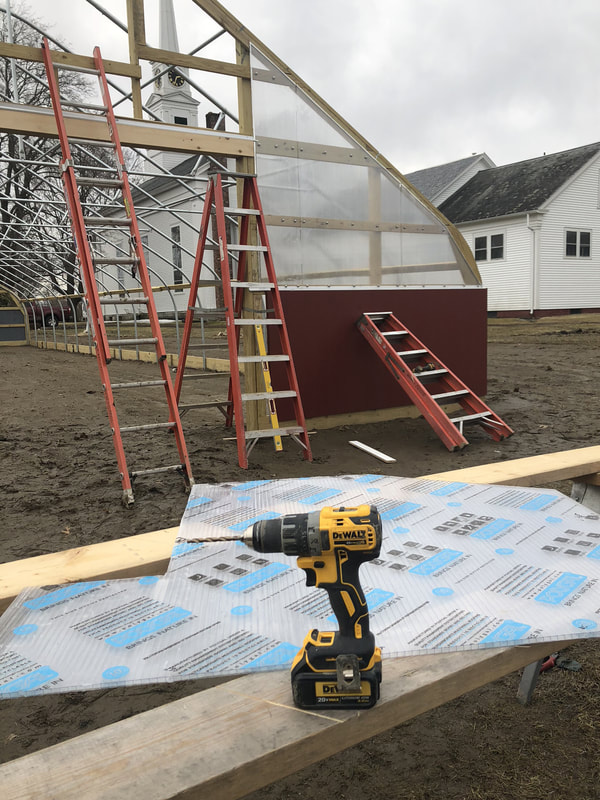
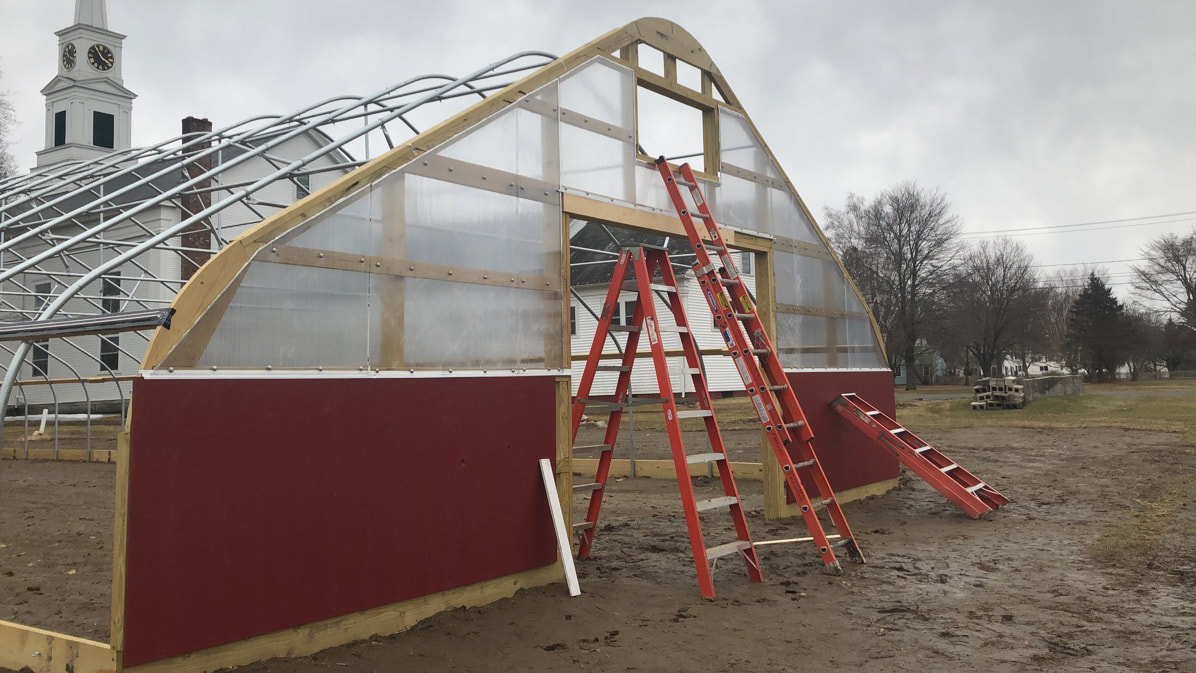
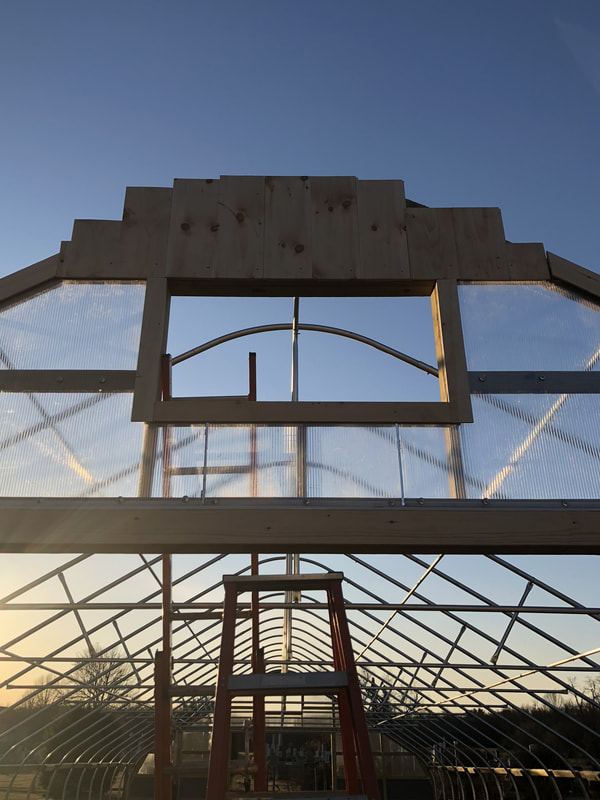
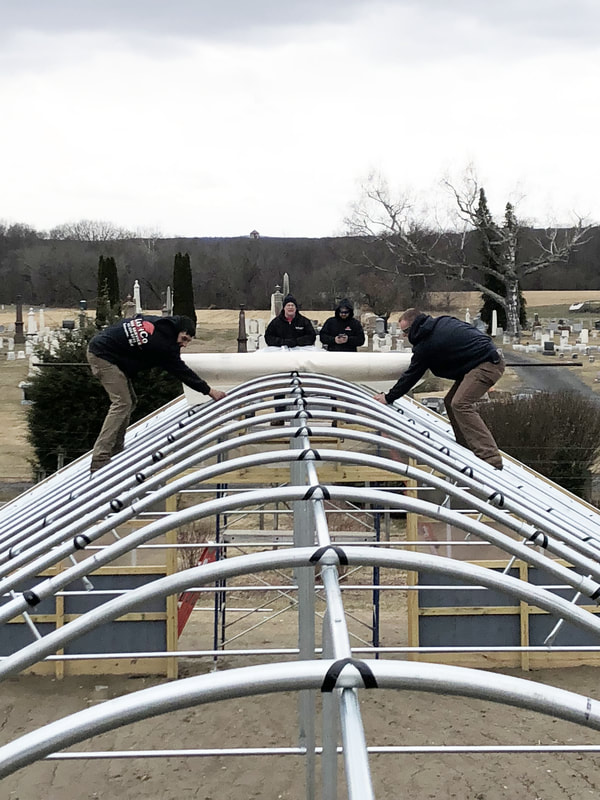
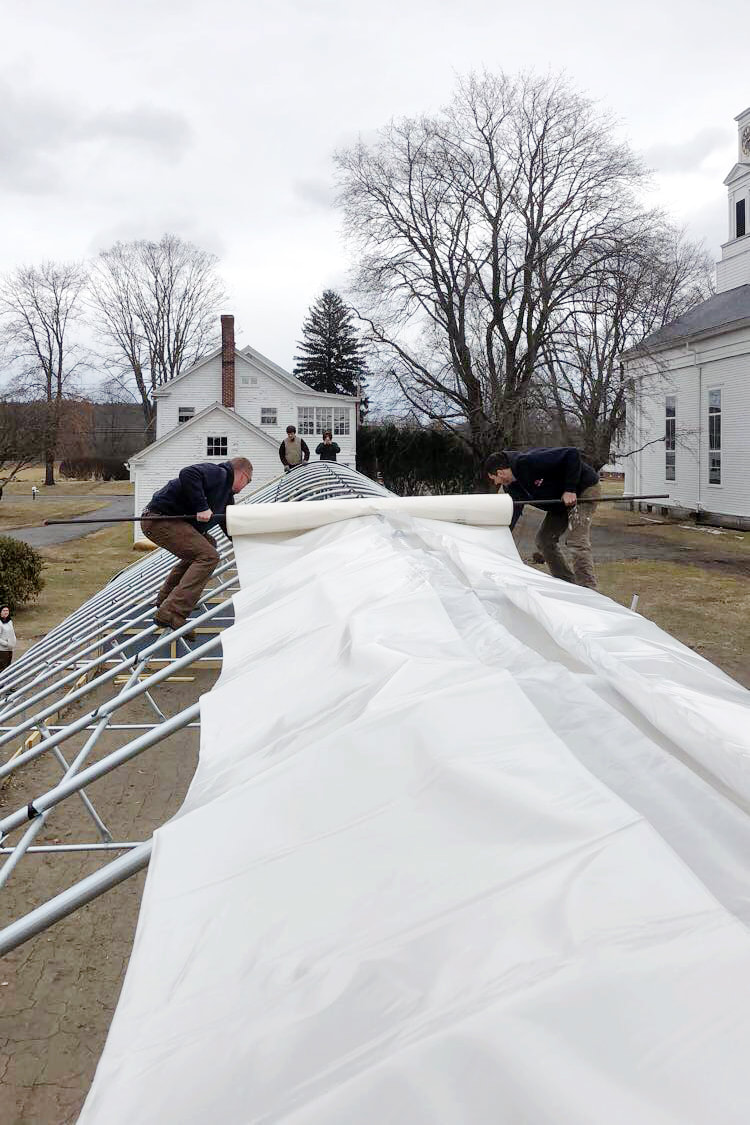
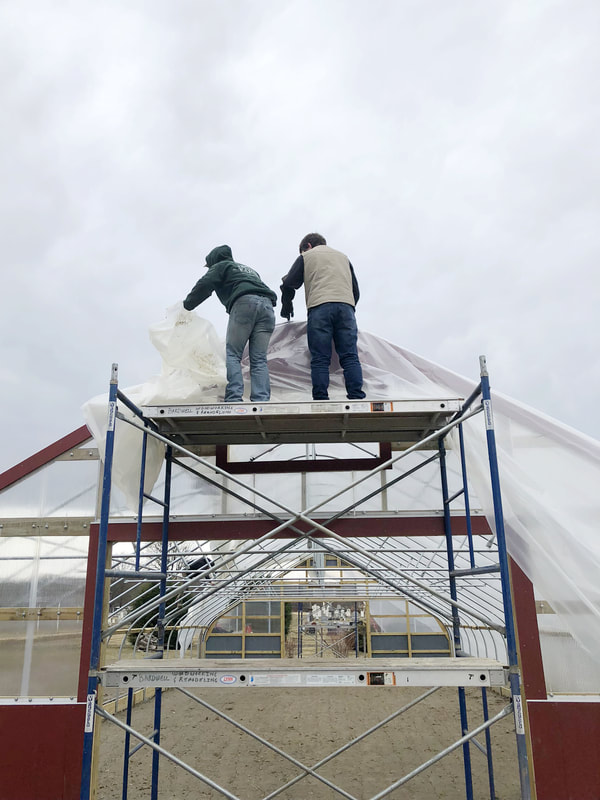
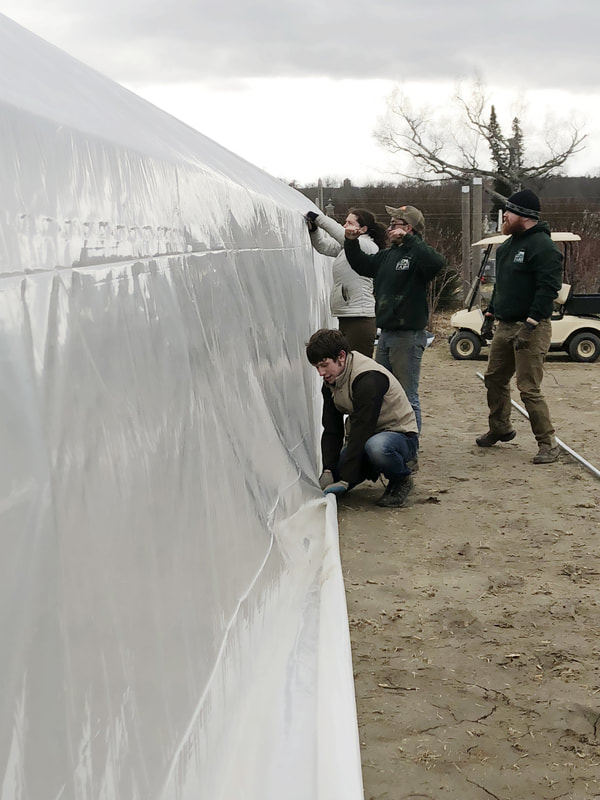
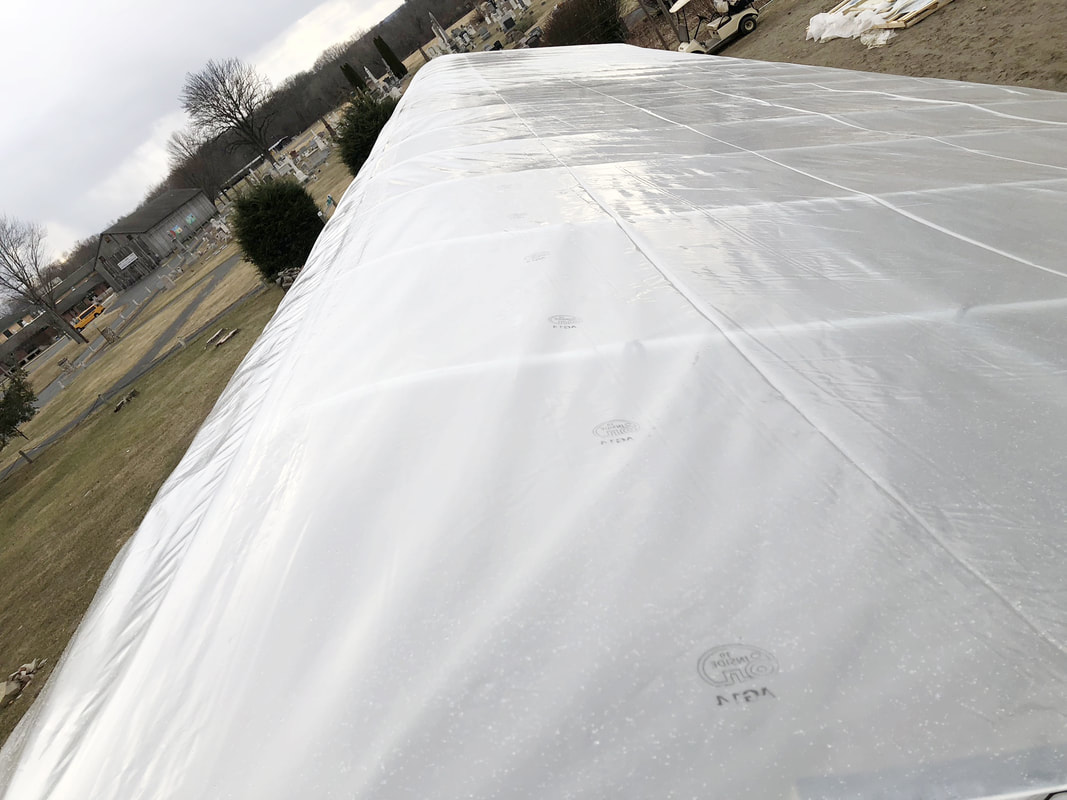
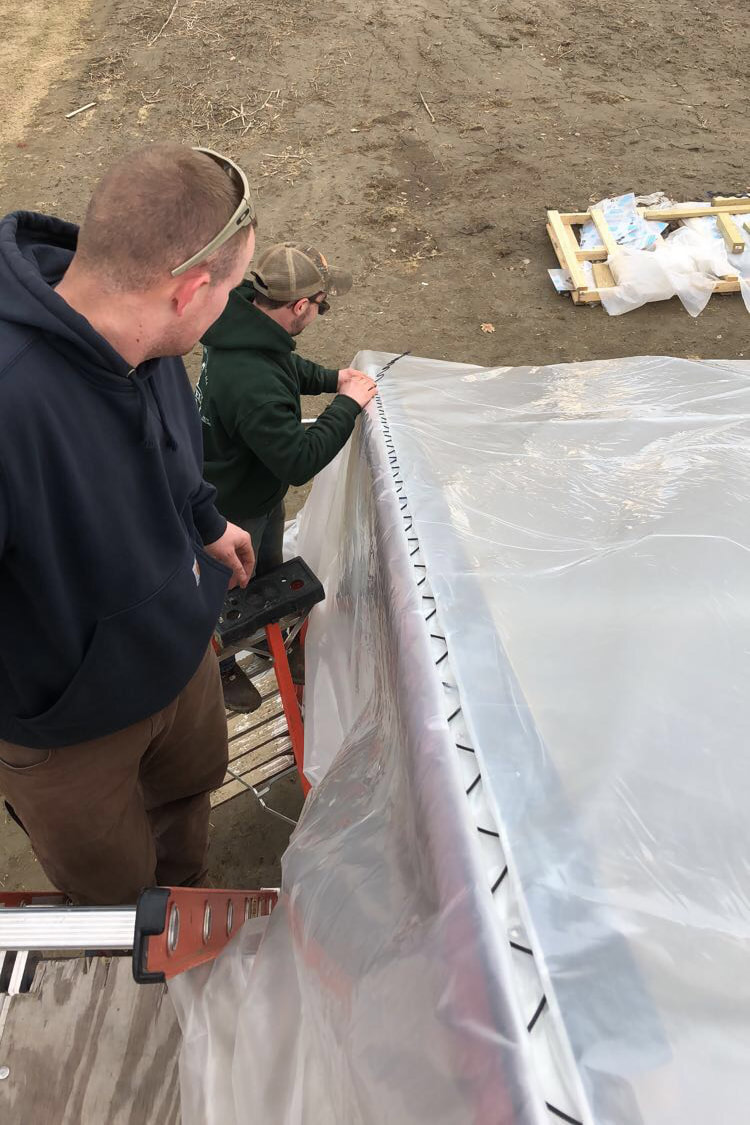
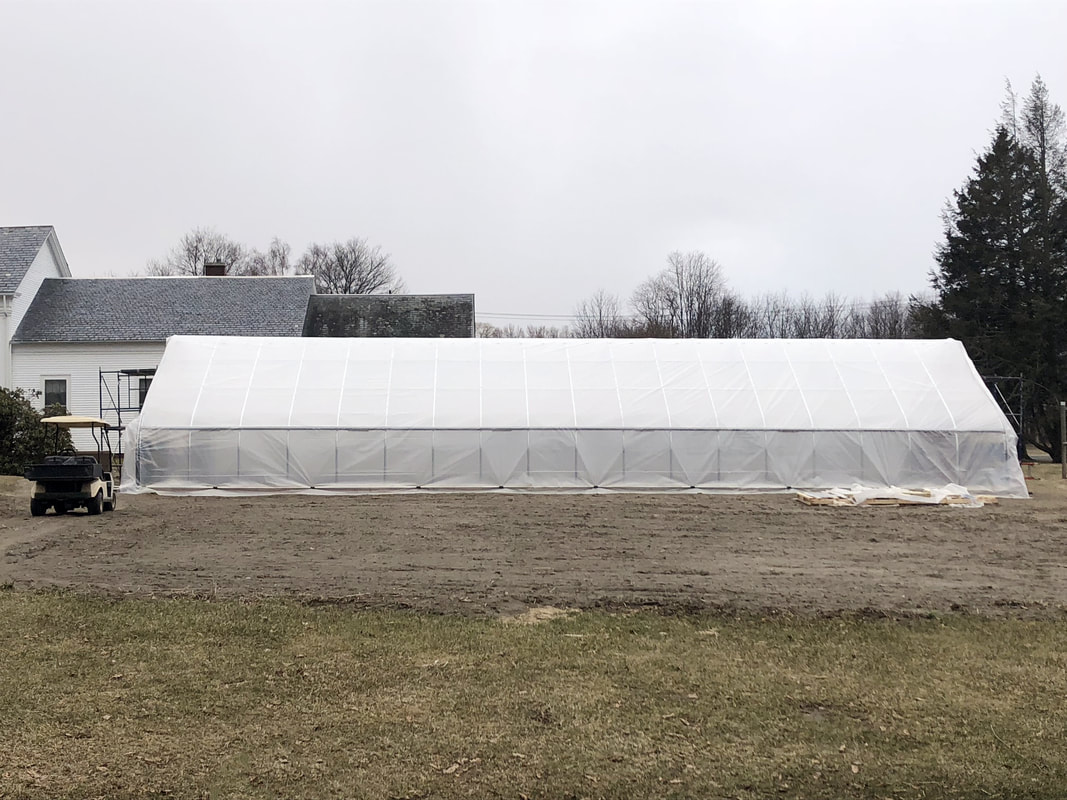
Today we celebrate Earth Day, but it shouldn't be the only day of the year we acknowledge the big blue marble we live on. Now more than ever It is an every day fight for it's health and protection. The very soil we live and grow our food on is at risk and we need it now more than ever. Without rich and fertile soil, clean air and water, our ecosystem becomes nonexistent. We have to do more. Millions and millions of people will be taking part in local events to demonstrate why they care about the environment and why it's so important to be a voice in this cause. My wish is to celebrate all yearlong so that our children's children have an Earth to farm, to picnic, walk barefoot in the grass, and enjoy what we have so taken advantage of. Please take a moment today to realize how important Mother Earth is to us. How will you celebrate Earth Day?  We are so excited about our new high tunnel! Wait, what? You're not really sure what a high tunnel is? Let me tell you all about it... A high tunnel is a non permeant structure that is used for growing crops in the soil and/or raised beds. It's primarily used to extend the growing season by having a controlled growing environment. This new system will give Bardwell Farm the capability to grow a quality crop much longer. As many of you know we started this project back in November as we were closing for the season. We started by laying out the demensions on the land where the structure was going to sit. This was a process of applying the dimensions, then grading and leveling the land to make it as flat as possible. It's important to build the structure level and true, it makes a world of difference and helps the building process go that much smoother. After the leveling process we lined-up 4 foot pipes that would make the base of the structure. These were spaces every 4 feet in a row on each side of the field. The pipes were pounded about 2 feet into the earth to create the foundation for the high tunnel. 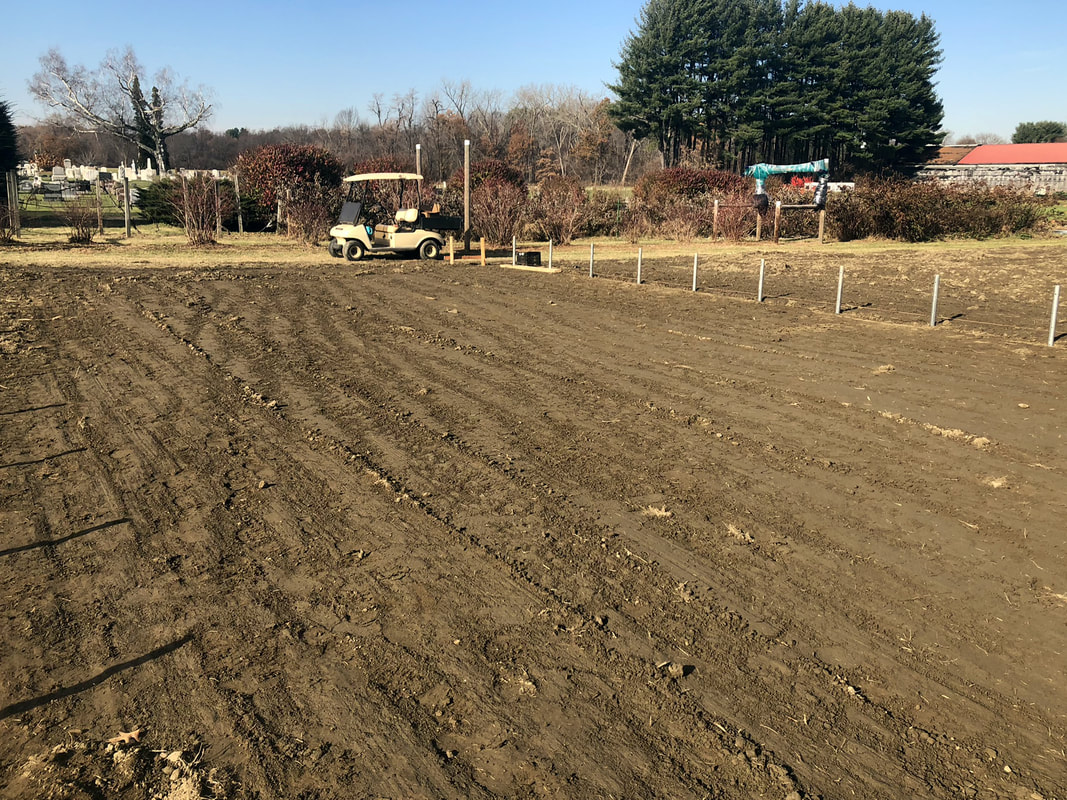 Ground level and ready for bows Frame bows were assembled off site then brought in to be put in place. The bows were so light three of us were able to pick them up and slide them into place. Once completed we tied the structure together using purlins, cross ties, and corner braces. These were all bolted together to make it solid. This part of the project went up fast! We encountered some challenges with end wall design and bad weather hindering progress. It slowed us down a bit, but didn't halt our work. We decided to use 4X4" posts as structural supports to hold the end walls to the ground and structure. It's quite difficult working with round metal pipe and wood. We finally came up with the perfect design plan to build these end walls. The lower half is going to be shiplap boards and the top will be a polycarbonate double layer honeycomb hard plastic that will allow light into the structure. Once the doors are mounted on to the end walls the next step is putting the plastic on the roof. This is a BIG TASK! We'll need a good size crew of people. A double layer of plastic will be added to the rough of the structure. One is an infrared plastic to capture sunlight and hold in heat. The top layer of plastic is clear to let sunlight in. Lastly, near the roof, a small blower fan will be installed to create an air gap between the two plastic layers. This is used to make an insulation layer to help retain heat inside the high tunnel during cold parts of the spring and fall seasons. The last step is adding the irrigation system and horizontal ventilation fans to create the most efficient environment for growing our crops. I cannot wait to finish this up, we are so close!
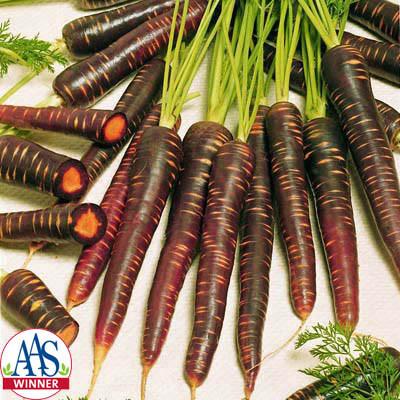
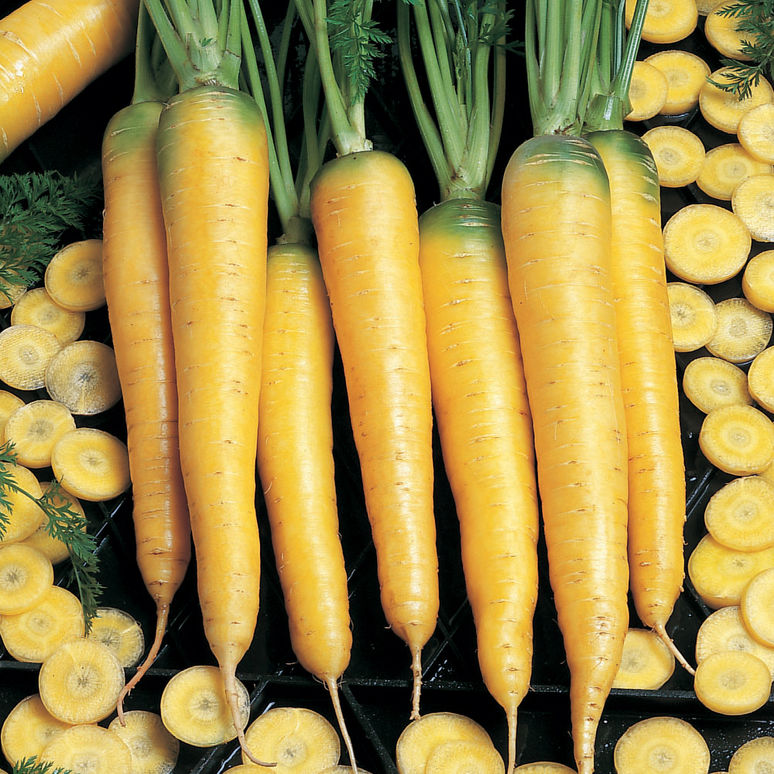
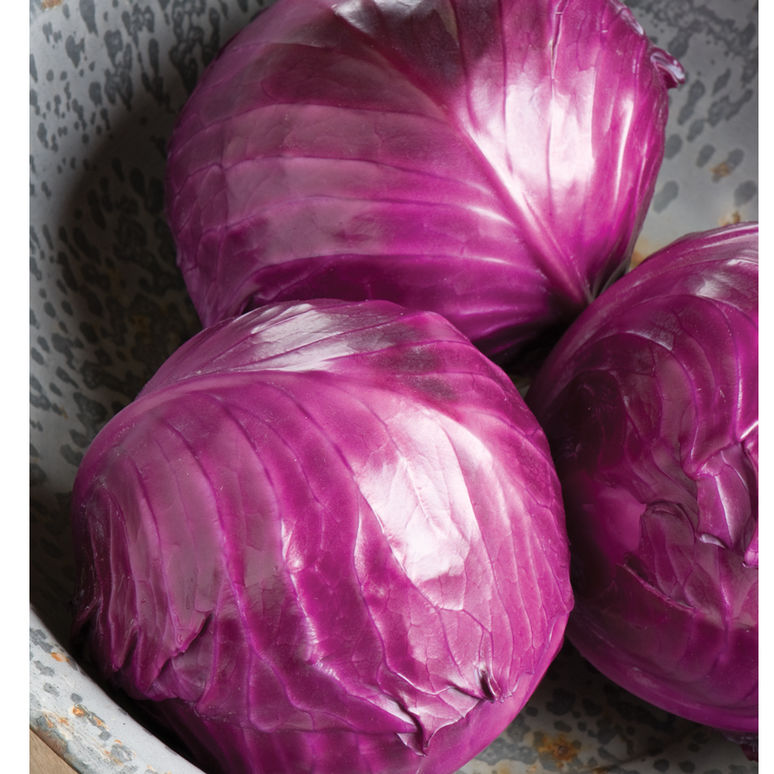
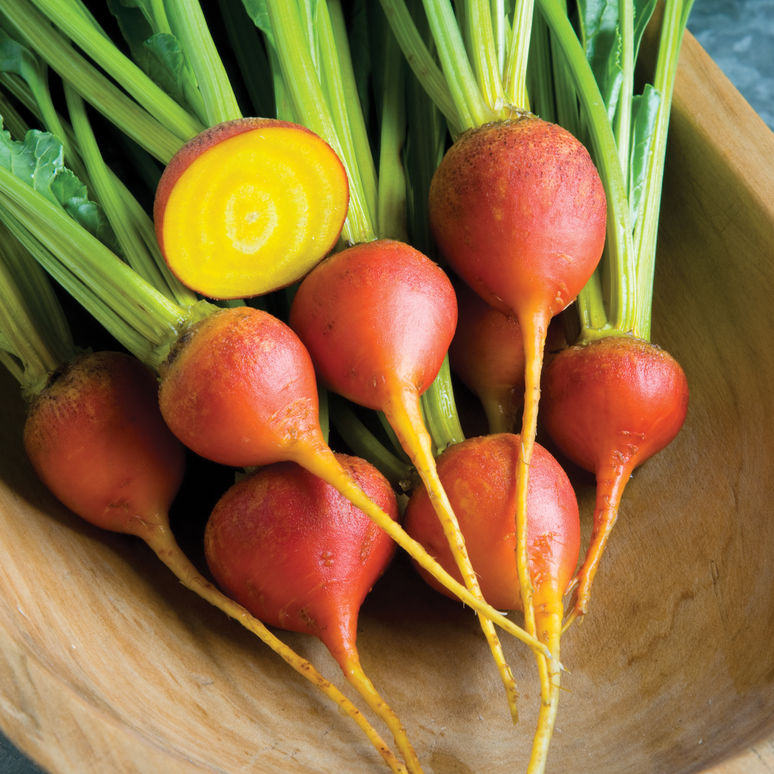
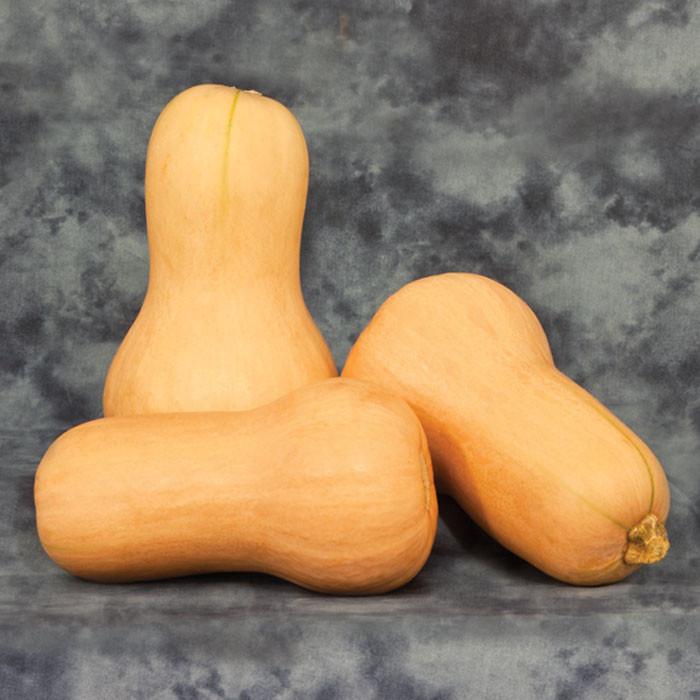
Thanks for reading and stay tuned for The High Tunnel Project: Part 2 coming end March. Here at Bardwell Farm we are always looking for new fruits and vegetables to incorporate more diversity for your dinner plate. This season we are introducing several new products and varieties to what we are already growing, as well as fresh herbs to add zip to your menus. Here is Part 1 of our 2018 Season Preview! Purple Haze Carrots The Purple Haze variety has a striking color with a deep purple exterior and contrasting orange interior. It tastes sweet with a mild peppery flavor. It's perfect raw in salads, steamed side dish, and really amazing as a juiced beverage. Yellowstone Carrots The Yellowstone variety has 6 to 8" long roots and are deeper in color than most other yellow carrot varieties. They have a mild earthiness flavor and they're notably a bit sweeter than orange, red, or purple carrots. Cabbage Ruby Perfection This is a number one mid to late red cabbage. The heads are medium-sized and dense with a uniform high-round shape and good wrapper leaves. The flavor is slightly peppery and a little deeper and earthier than green cabbage. It's color makes coleslaw and leafy green salad mixes beautiful. Touchstone Gold Beets This beet has smooth golden roots with bright yellow flesh and retain their color when cooked. They have a mild sweet earthy flavor. Avalon Butternut The Avalon variety is larger with a bright orange color and a more uniformed shape. It has a mild nutty flavor and compared to that of a sweet potato. Betternut 900 This variety just may be better than the others, you can be the judge this fall! This winter squash is flavorful, nutritious and packed with numerous vitamins. It has that "autumn" taste that can be associated with pumpkin, just a bit sweeter. Crimson Sweet Watermelon Tasty and so refreshing, this variety has crisp, orange to red flesh, with a sweet summer flavor and small brown seeds. It's a 15 to 25lb melon perfect for parties and good times with friends! Sugar Baby Watermelon This variety is a smaller 8 to 12lb watermelon that is filled with sweet goodness. The firm solid flesh is bright red, crisp and delicious with small brown seeds. Sugar Cube Muskmelon This melon is personal-sized coming in at 2lbs. Although Sugar Cube is small it's big on taste with it's sweet deep orange flesh that has a superb eating quality. Join us next week for Part 2 of the 2018 Season Preview!
Did you know soil is happiest when there's always something growing on its surface? Cover crops are so simple yet have so many amazing features! From being used as a weed suppression tool to preventing and reducing disease pressure, cover crops are vital to cropping systems for so many reasons. First of all, did you know a cover crop can almost never have a negative effect on a cropping system? Their only job is to build and benefit soil health in a natural way. Nothing sparks my interest more than improving soil health in an environmentally friendly and sustainable way! It has always been our goal to use cover crops to feed my plants instead of conventional fertilizers. It creates a healthier environment for the plants and produces higher yields in an organic way. What is a cover crop? cov·er crop | noun A crop grown for the protection and enrichment of the soil. Why are cover crops so important? Cover crops act as a barrier between the soil and the atmosphere. They are a huge benefit because they hold the soil in place during the fallow times of year, as well as feed the microbes in the soil that create vital nutrients that plants require to grow. Soil microbes, earthworms and insects are key to plant growth and development. NOTE: Fallow is leaving a field out of production for a year so, while growing a cover crop, keeping it protected and rebuilding soil nutrients and overall health. The cover crops roll in all of this is taking the carbon out of the atmosphere and putting it back into the soil which the microbes feed from. Without cover cropping the soil is more prone to deteriorate with no structure holding it in place, flooding and erosion, and/or being blown away. The first 2 to 3 inches of top soil is some of the most important for growing. Without cover crops farming would be much more risky and difficult. Here are examples of cover crops that are vital to farming: Winter Rye This is a cool cover crop that is primarily used in the fall for holding the soil in place to prevent winds from taking it. This crop can germinate and grow in temperatures as low as 33F degrees. It also grows very rapidly giving lots of biomass and has an extensive root system for soil holding power. Winter Rye overwinters meaning it will keep growing in the spring again so it needs to be killed-off. The other benefit of Rye is it can be a forage crop meaning it can be cut for straw right before the rye goes to seed to make bales. This is a great way for farmers to bring in extra revenue while benefiting their fields. NOTE: Biomass is plant matter. Grass that is produced from Rye and Sorghum cover crops are filled with nutrients that can be put back into the soil. Tillage Radish This cover crop also called Forage Radish or Dicon Radish. This is a fall-seeded Brassica that has a very neat feature. This crop acts as a natural subsoiling tool. It grows a large taproot to breakup soil compaction by creating holes in the soil for water drainage to reduce erosion problems. Tillage Radish winter-kills after a few hard frosts and breaks down by spring. NOTE: Brassica is the scientific name for cold weather crops, species such as cabbage, broccoli, and radishes. Peas & Oats These cover crops work well as companions to optimize soil health. Peas are just a field pea that can be used as forage for animals. They are also a legume crop meaning they collect and store nitrogen so it does not leach or volatilize into the air. Peas can also be harvested and sold to specialty restaurants for salad mixes as well. There are many different benefits to this cover crop. Oats have a shallow root system but grow fast in warm weather and act as great biomass cover for in-between crops. They hold lots of nutrients and act as a great "green manure" crop to incorporate and plant into soon after. Both are winter killed and work well together to serve dual purposes. NOTE: Volatilization is when nutrients are essentially evaporated into the atmosphere and are no longer taken into the soil for plant growth. NOTE: Green manure crops are cover crops filled with nutrients that can be incorporated into the soil to feed microbes. They are full of organic matter, carbon, nitrogen, and phosphorus sources. A pure natural fertilization. Cover Crop Cocktails A cover crop cocktail is a mix of 2 to 3 different cover crops that work together in unison. For example, I use a mix of Peas, Oats, and Tillage Radish as a cover for a field that is going to be planted with Asparagus the next year. I use this mix because it will all winter-kill and asparagus has to be planted early. I also use it as weed suppression because of the high amount of biomass. The Peas are an awesome nitrogen source for the new roots going in. The Tillage Radish is to create good drainage and water absorption capacity as well. Red Clover This is a low lying crop that does best in cooler seasons. Red Clover is a short-lived perennial used to supply nitrogen. Unlike other legumes, it fixes a lot of nitrogen even in high-nitrogen soils. It has shade tolerance so it can be over-seeded into small grains and incorporated in May of the following year. Since Red Clover seedlings tend to be slow growing, it benefits from a nurse crop. It forms tap roots and is useful for remediation of compacted soils. Red Clover is also good for weed suppression. This crop can be seeded as early as February to March for frost seeding or from April to September depending on what you use it for! Blossoming is something that needs to be controlled in warmer temperatures. Such a small plant with endless benefits! Mustard In the Northeast Mustard is used as a fall-planted cover crop that winter-kills. This crop thrives in cool conditions and can give 100% ground cover. It adds organic matter, breaks up hardpan, and suppresses weeds in the following crop. Soil-borne diseases may be suppressed by natural compounds found in the residue of crops such as mustard, cabbage, radishes. These act as natural defenses to certain soil borne diseases. There are three species of Mustard that behave similarly when sown in the fall. This is a very low maintain cover crop that offers a wide variety of advantages for your soil. It is best seeded between mid July and August. You will want to kill at the flower stage if not winter-killed already to prevent the Mustard from seeding-out and becoming a weed in the field. Great for a natural disease suppressant which is a great organic way of dealing with devastating diseases that are presented every season. NOTE: Seeding-out is when the plant is it's final reproductive stage where it has matured all the way to produce viable seeds that can be replanted again to continue the life of it's species. At this point all the nutrient from the plant is pushed into the seed and lost. Incorporating this into the soil will create two negative scenarios. One, adding dead biomass that will take longer to breakdown and create a loss of nitrogen in the soil. Remember, nitrogen is used to break down dead matter. And two, you are creating field weeds from all the mature seed. Sorghum Sudangrass and Sorghum-sudangrass are midsummer grasses suitable for short 8 to 10 week plantings. These grasses are the most heat and drought-tolerant cover crops typically grown in the Northeast. Sudangrass growth is easier to manage because the stems are narrower. It can be sown earlier than Sorghum-sudangrass, and suppresses weeds better. These crops provide abundant root biomass, which is useful for increasing soil organic matter. Mowing encourages root growth. They suppress Root-knot nematodes and inhibit weed germination if densely sown. These are warm season cover crops that generally can be seeded between June through August. NOTE: Nemetodes are beneficial and non-beneficial microbial worms that are both pathogens that attack and hurt pants and/or help defend-off other diseases and help with plant development. I'm glad I was able to share my love of cover crops with you! There are so many varieties each with their own unique benefits. It's an endless opportunity for experimentation. We promise to keep you updated as we try different ones as the seasons progress.
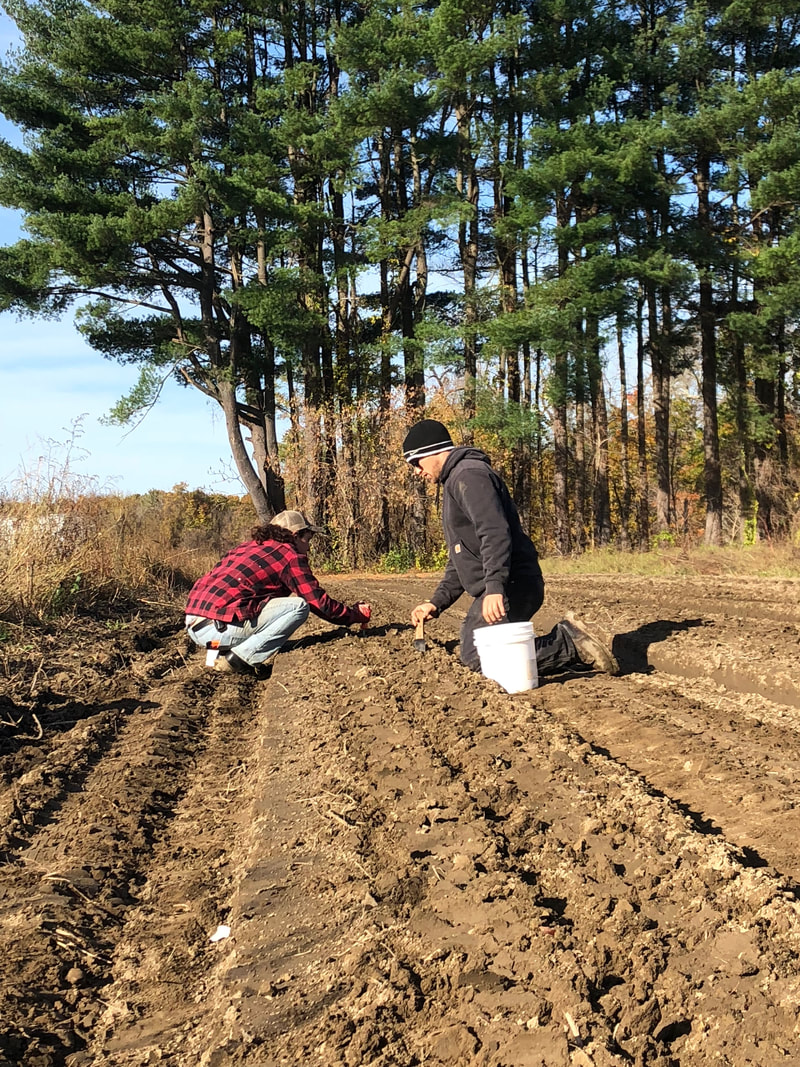
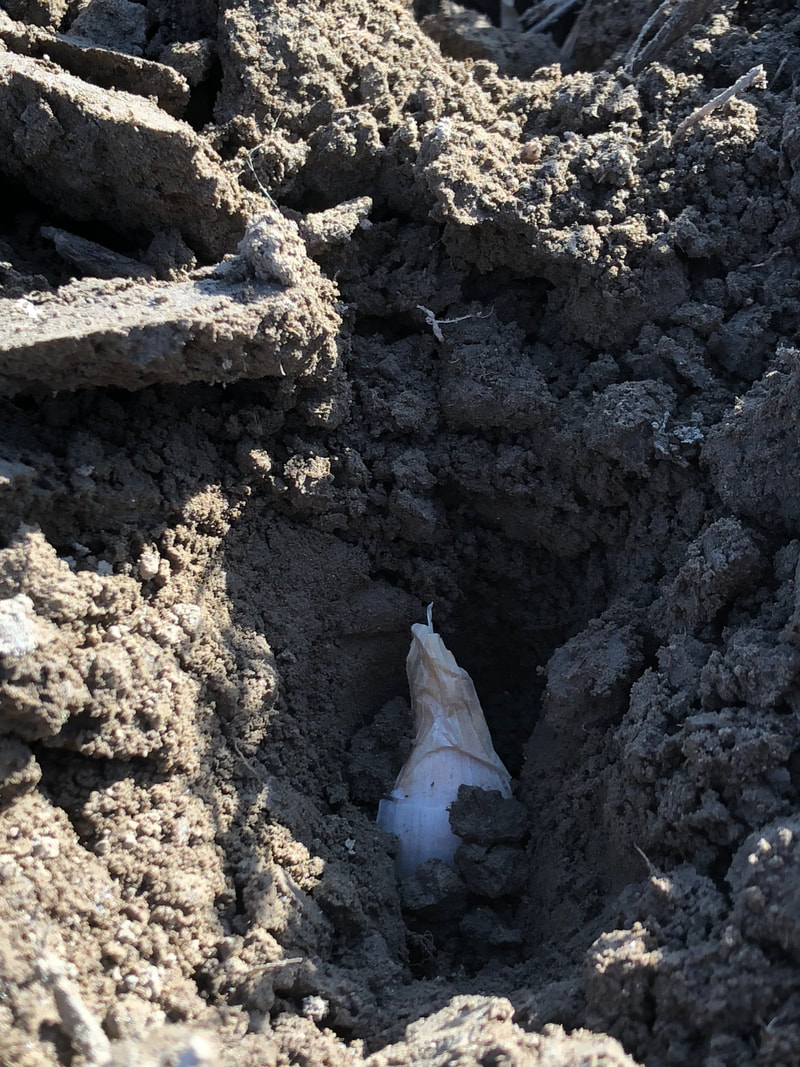
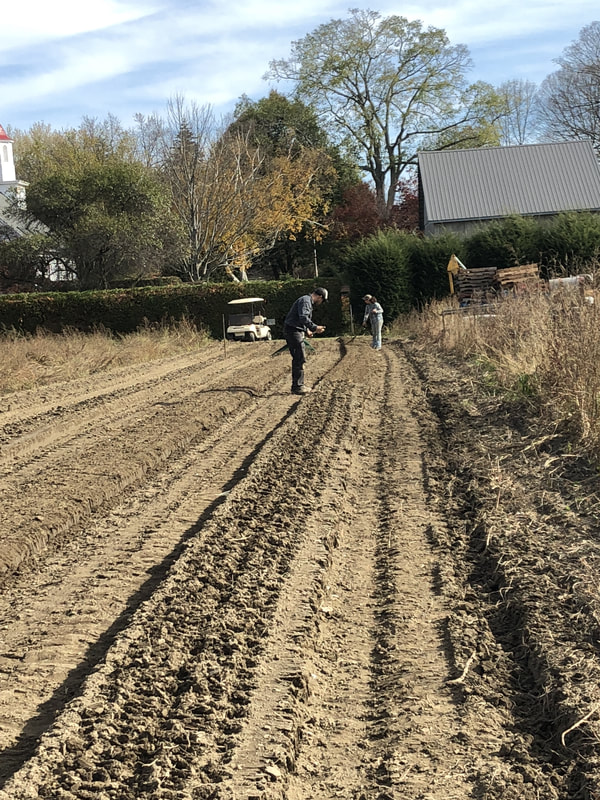
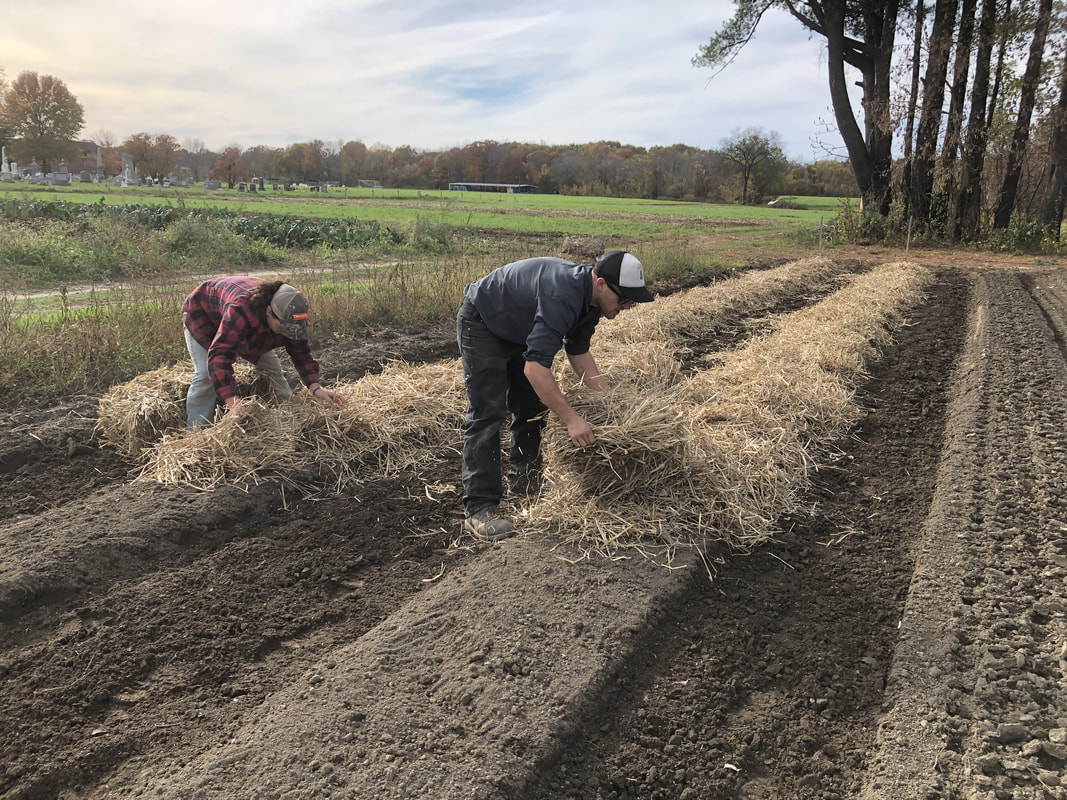
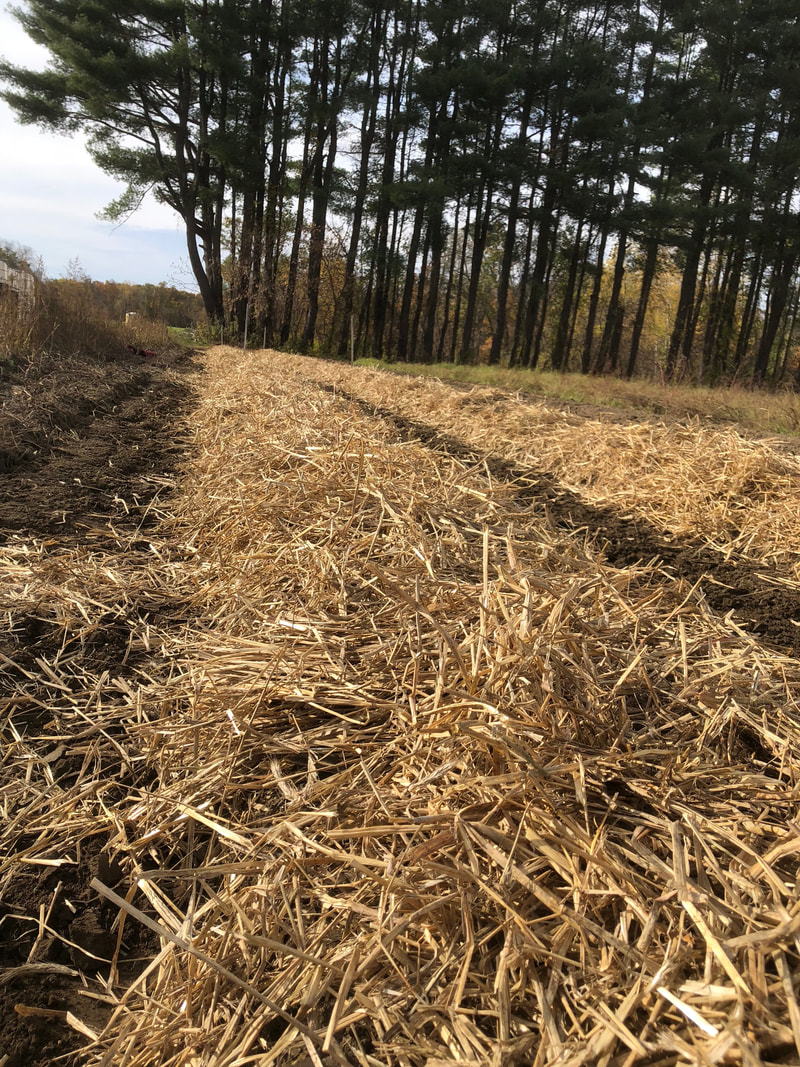
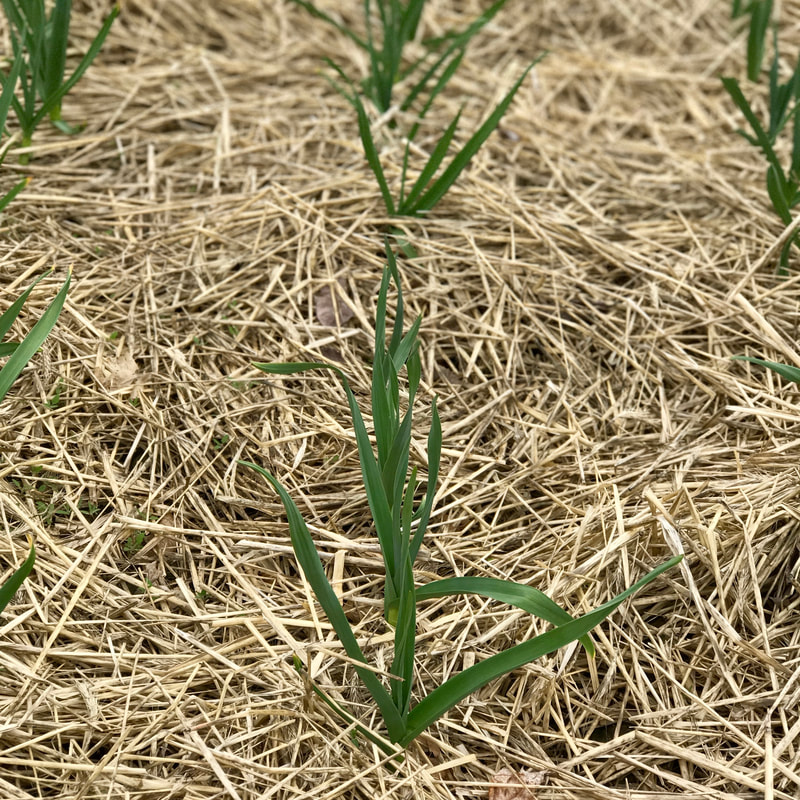
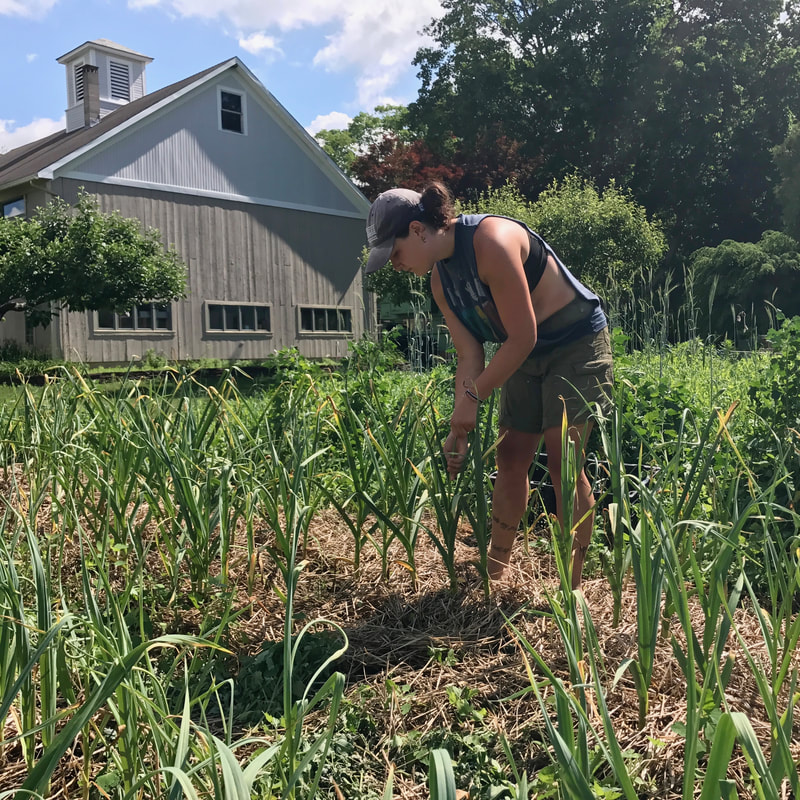
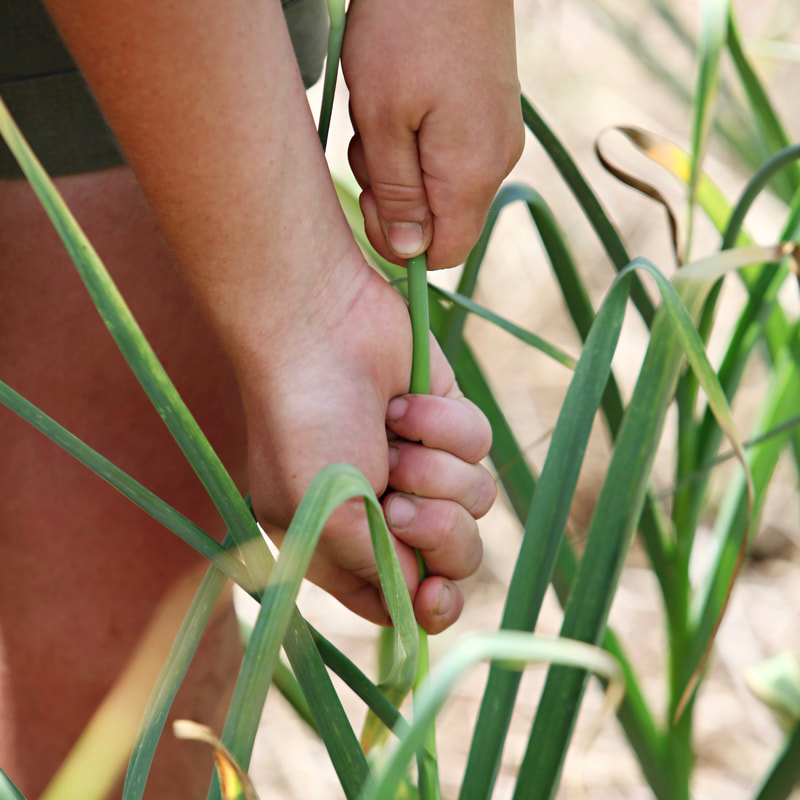
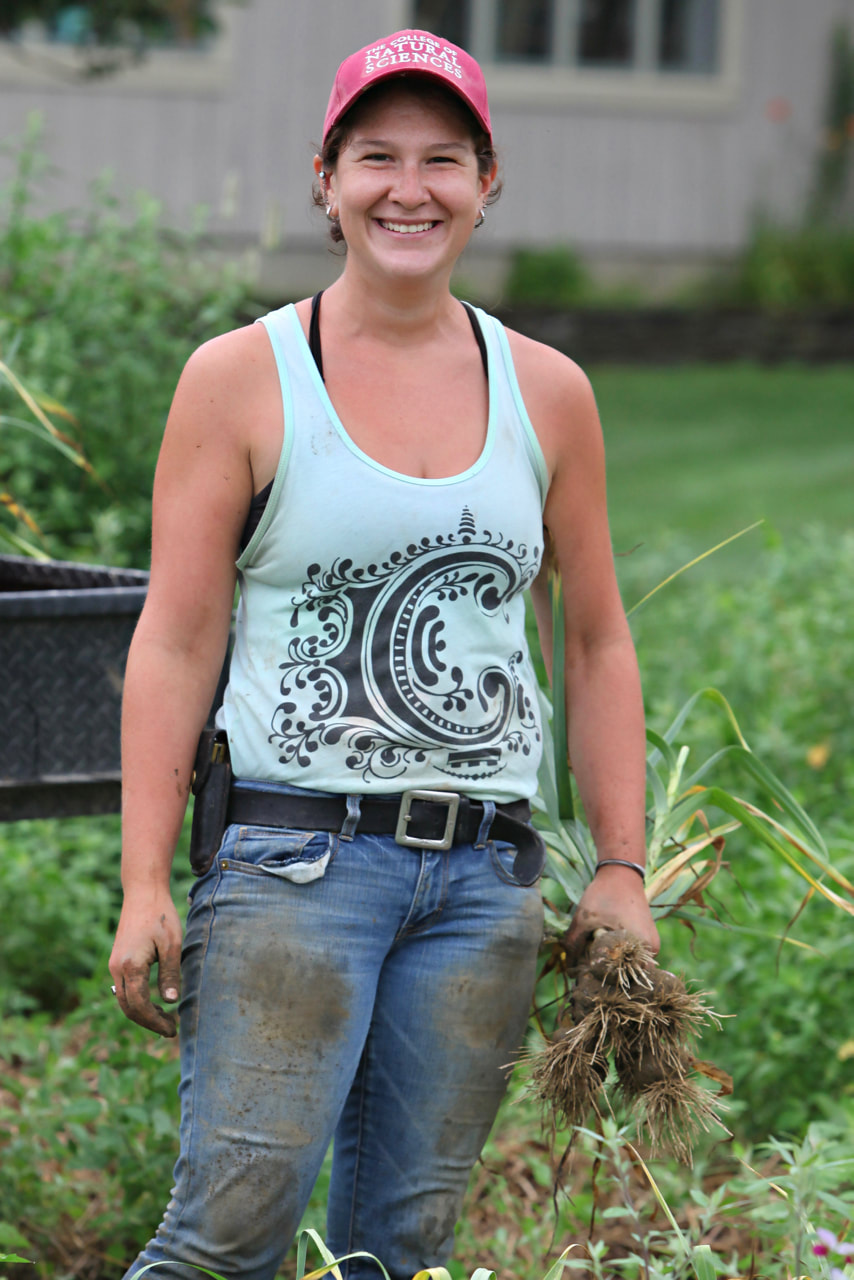
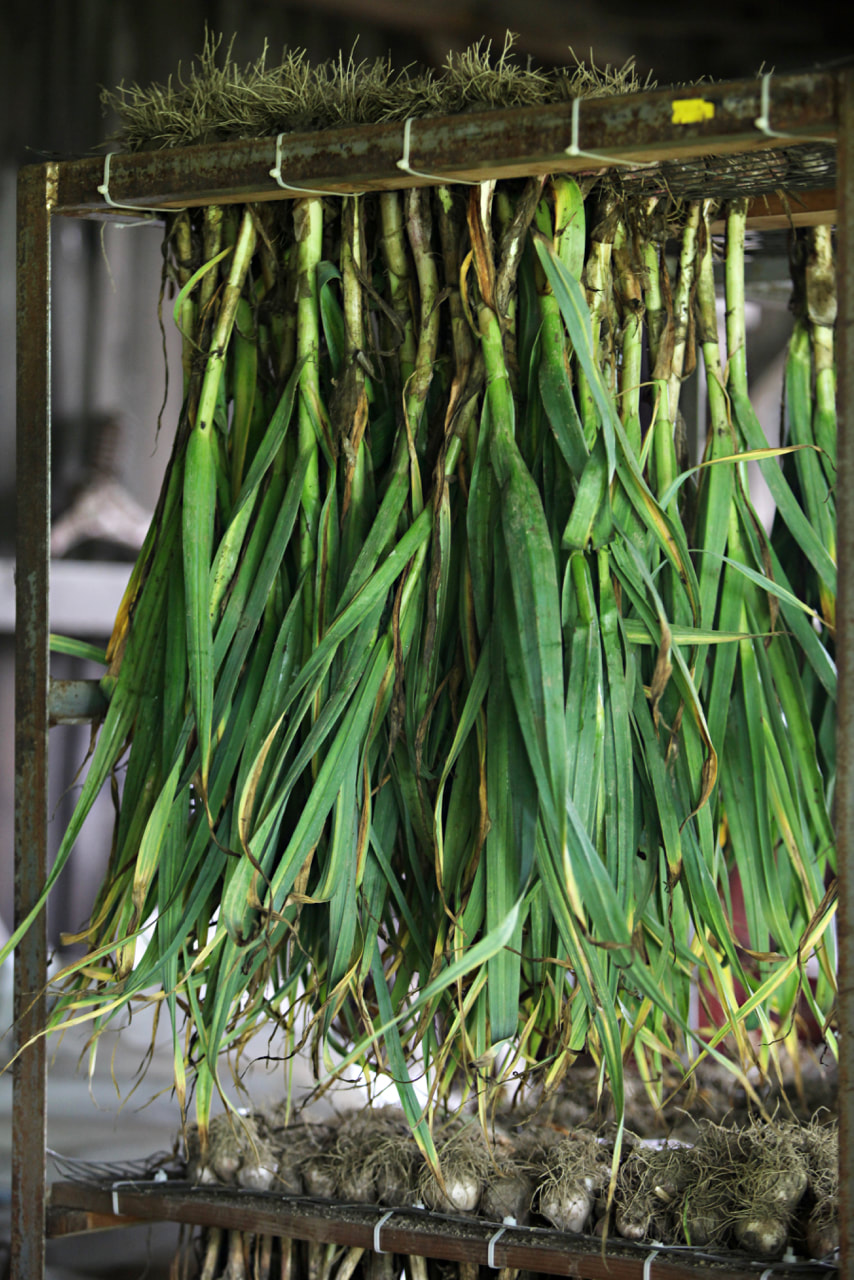
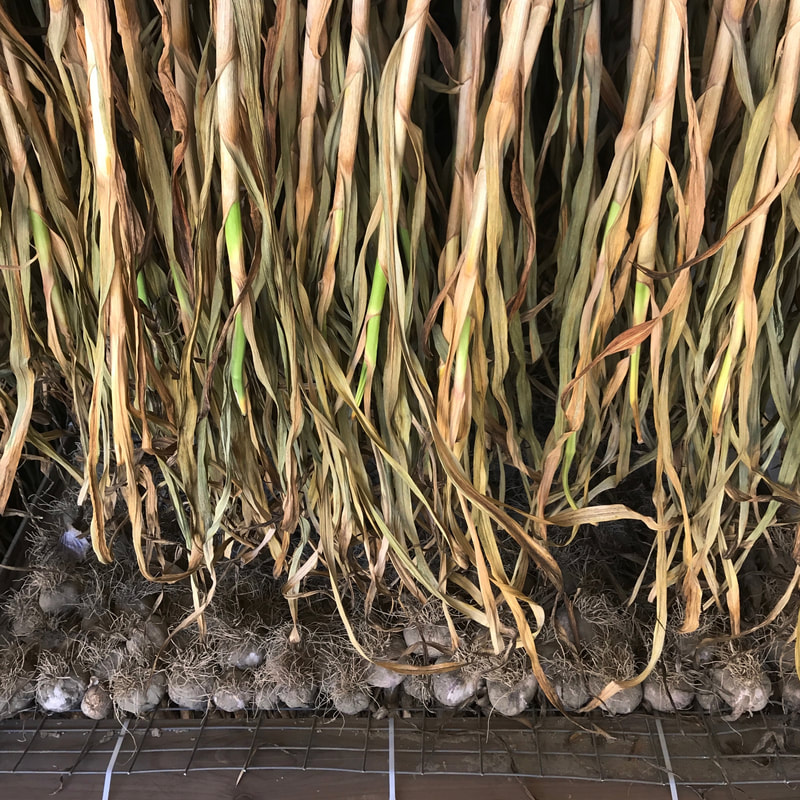
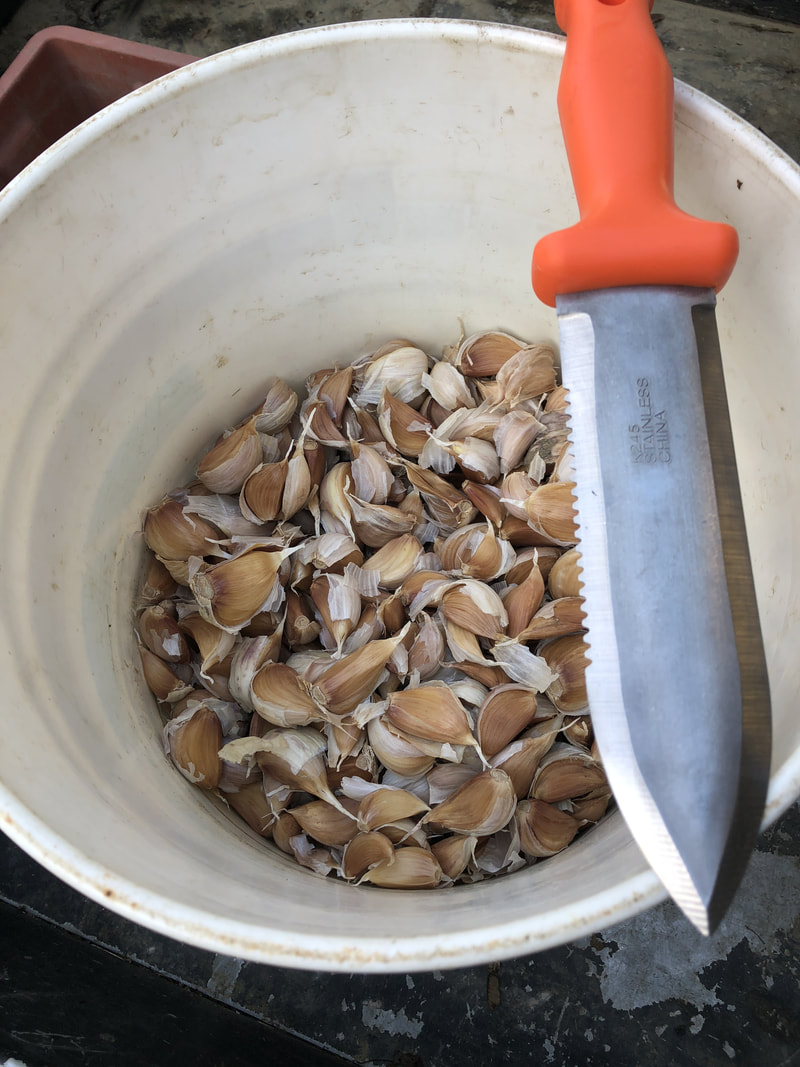 Garlic is a bulb crop that is planted into the ground in late fall to overwinter, then is harvested in mid July of the next year. The reason for this is because garlic requires two months of temperatures below 40F degrees to induce bulbing, which is growth of a new bulb. This process is called a cold treatment. On the farm we plant hard-neck garlic, verses a soft neck garlic. Garlic seed comes from the years garlic harvest usually if seed is viable and healthy. The very cloves that we eat are the next seasons seed. Every year at harvest we set aside the nicest and largest bulbs for planting. We select bulbs like this because here the size is a very important factor, the bigger the cloves the bigger the bulb we are potentially able to produce in the next season. Bulbs are broken up into the individual cloves right before planting. The next steps to garlic planting is bed and field prep, just as we would normally do with cover crops. We plow, fertilize and harrow the land to prep the field. Next we use a bed shaper to make a raised bed for planting; this is a new tactic we are trying this year to see if this will improve bulb size, growth and water penetration. We are hoping the end result will be a better quality product when it's time to harvest. The final steps for planting prep is marking out the spacings to plant. We use our plastic transplanter and set up a system of three rows with 6" between seeds. This gives us a good template to have a uniform planting. Next we plant! One clove facing right side up in each hole, one at a time. We use a soil knife to create a hole, then plant the garlic clove in about an inch into the soil. After garlic is placed into their holes/slots in the raised beds we go over the top with a rack to brush soil into the garlic holes. The last and final step in the garlic planting process is to cover the beds with straw. It protects the seed and soil from winds, very cold temperatures (in case the cloves start to sprout), and weed suppression in the spring/summer. Now we wait until spring to watch the garlic sprout up out of the straw. Many thanks Trevor and Kaitlyn for your generous help! Just like everything else in farming garlic has it's own unique process. From when we plant, to when it's out on the farmstand there are a bunch of steps in between. It's so important to know your food and your farmers that we are going to share the process with you! 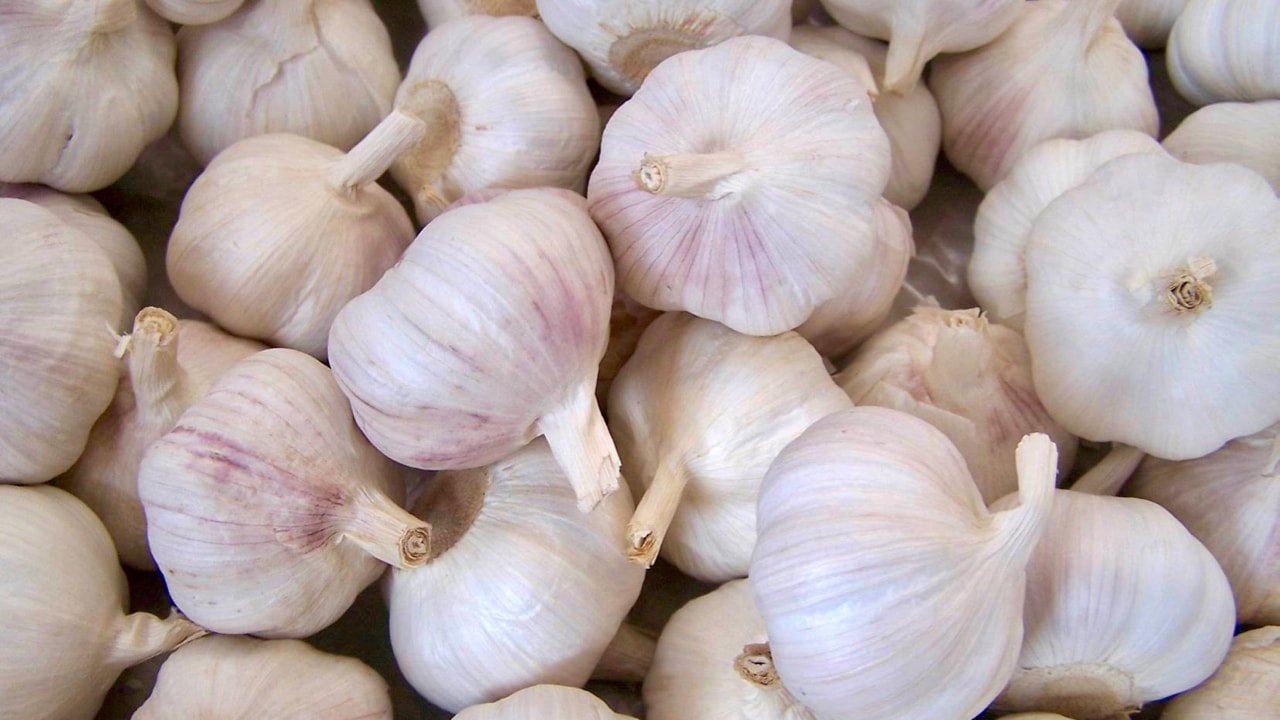 It all starts in the fall, just about mid-October. We plant one clove 6" inches in between the next, 1' foot apart and in 3 row sections. The beds are then covered in straw. The straw provides winter insulation and weed management for the following season when it gets warm. In the spring it pops through the straw. From early spring until about mid-June we cultivate, keeping the beds clear of weeds that would rob the bulbs of its nutrients. During this time we are also harvesting the scapes. It is the flower and stem that blooms from the garlic bulb. Scapes are a delicacy in the cooking world and are sold, but more importantly, by harvesting those, it provides more nutrients for the plant and in the end produces a bigger bulb. If you ever see scapes at our stand or at a farmers market, grab some and experiment. Use them just as you would regular garlic, they are really tasty! From June forward the plant begins to die back. When the greens turn brown we begin to hand pull the stocks them from the soil. Some farms use broad forks and undercutting machines, but we do it the old fashioned way When the harvest is complete we brush the soil from the bulb and rack them. We then store them in a cool dry place, it's just like curing. A fan is also setup to blow air through the stocks to speed up the process. They then have to sit for several weeks and dry before we groom them for the farmstand. After the bulbs have finished curing we cut the stocks down to 1" inch. We also trim the roots and clean the bulb by hand, pulling back 1 to 2 layers of the skin that surrounds the cloves.  And the finished product, beautiful Mount Hood Garlic!
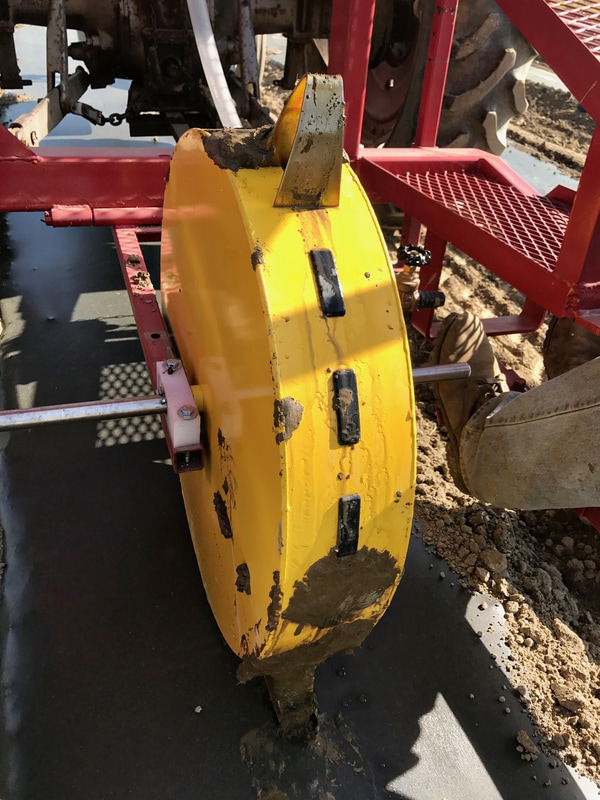
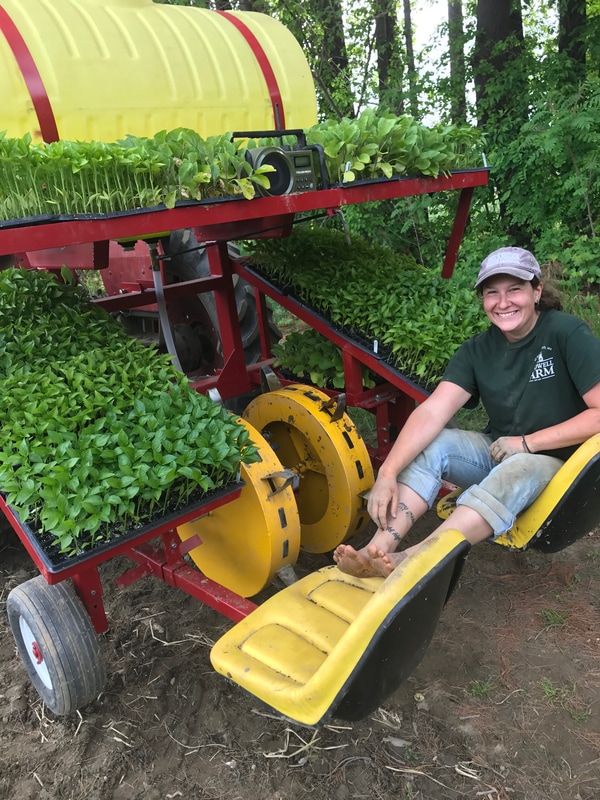
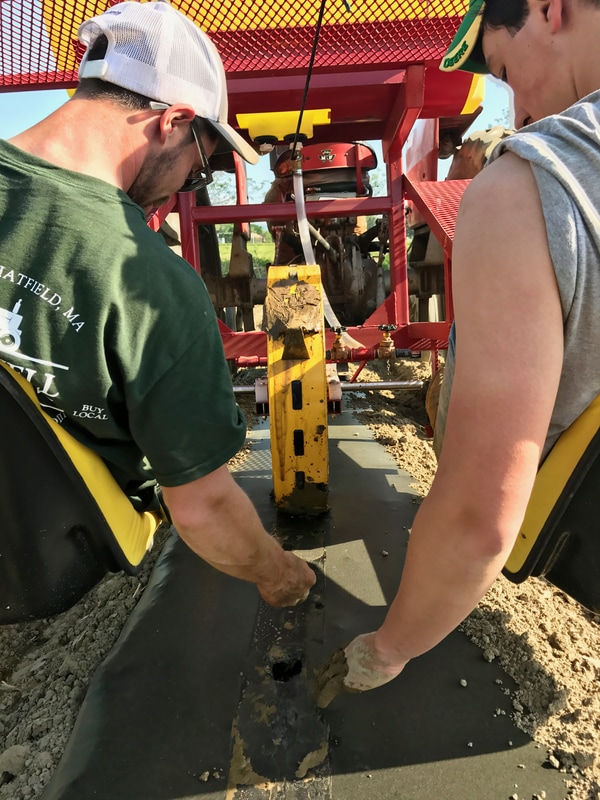
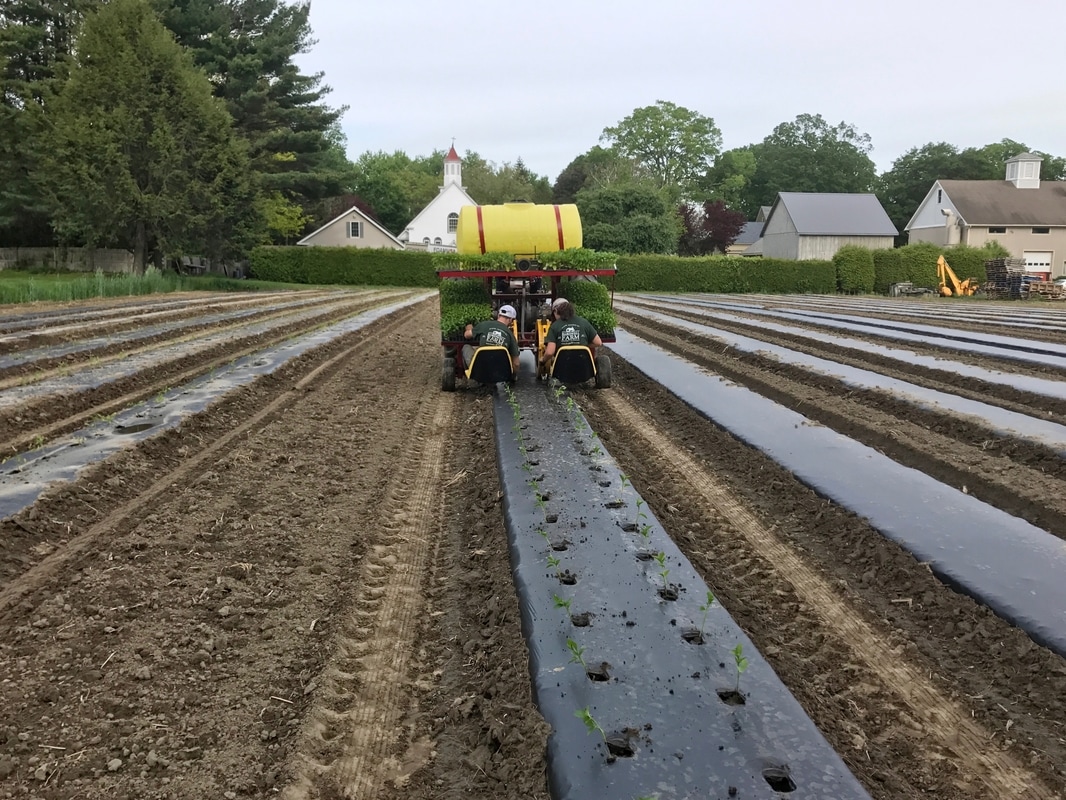
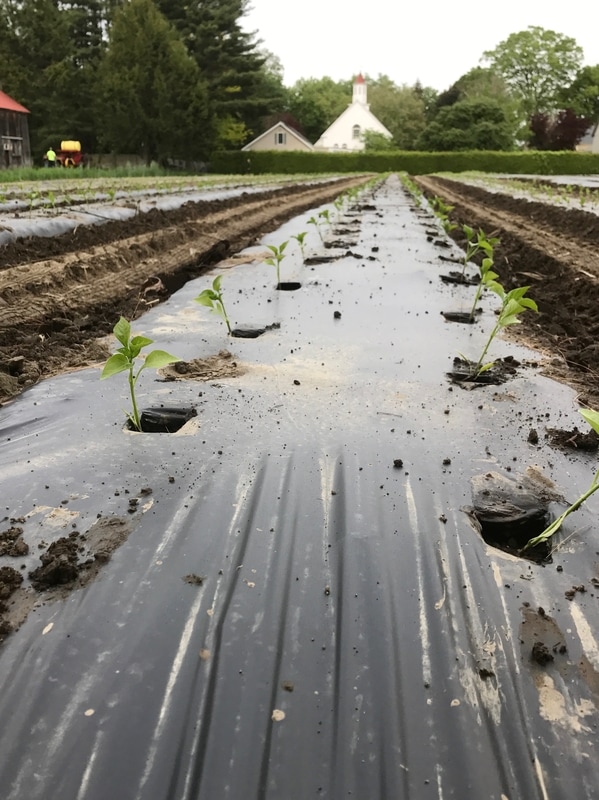
We bet you didn't know how much work goes into all those little bulbs you see on the supermarket shelves everyday :) For more Homegrown News subscribe to my newsletter! Like or Tweet this article to a friend by clicking the badges below. Thank you for your support. Ever wonder why farmers use black plastic in their fields? We explain here! Plastic mulch is a product used in a similar way to conventional mulch, to suppress weeds and conserve water in crop production. 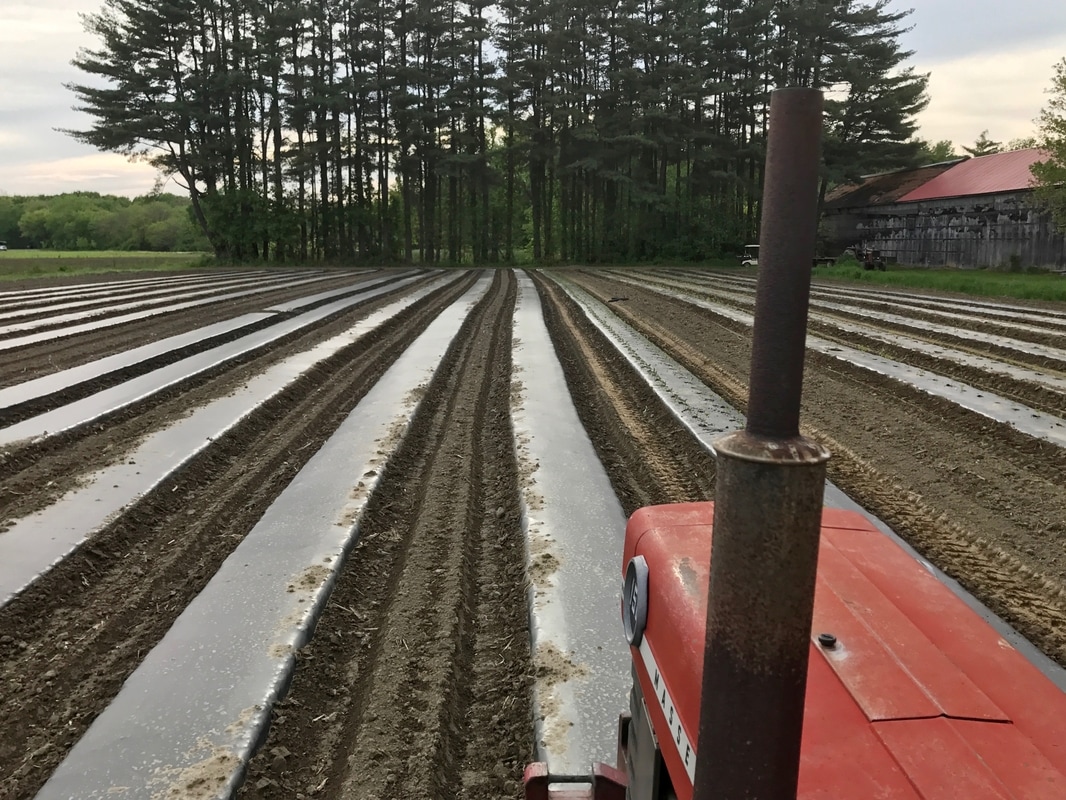 Seeds benefit from this method because you can plant earlier in the season. The plastic creates a humidity chamber and helps speed along the germination process. Under the plastic, drip tape is laid in the center of the raised bed to irrigate the crop. The raised beds helps with irrigation by preventing the seedling's roots from sitting in water. Because plastic mulching acts as a greenhouse for the soil it generates higher yields and more production. Weed control is another benefit of plastic mulching, more moisture and nutrients go to the crop, as well as saving time in field maintenance. After the plastic mulch is laid we use a plastic transplanter. This piece of equipment cuts through plastic into the raised bed and creates a plug for the seeds or seedlings. 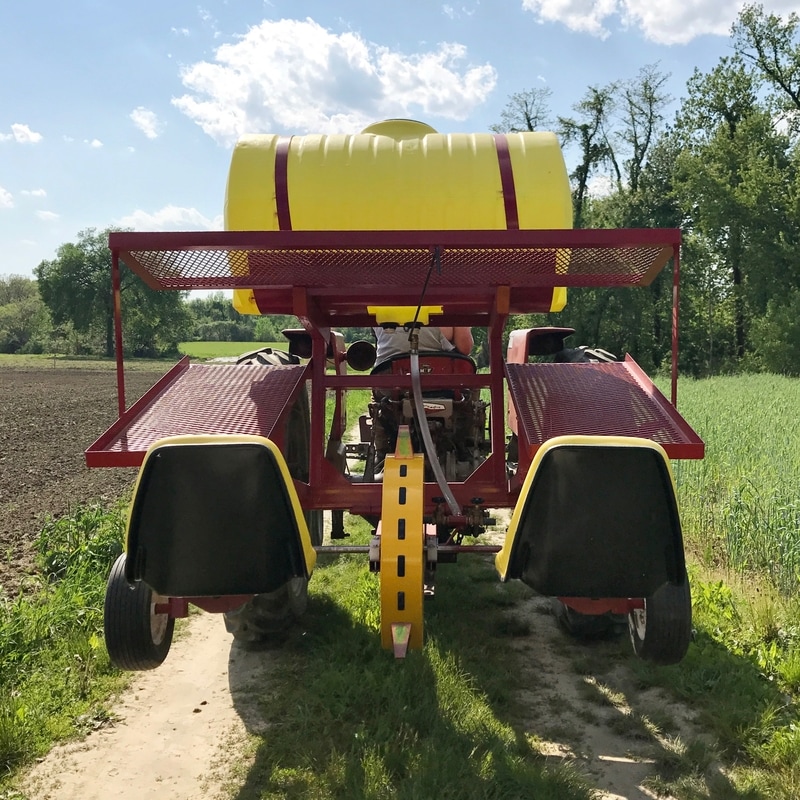 It has a center wheel with spikes that can be adjusted for different spaced plugs. It also has a hose that can deliver water and or fertilizer before the plant goes into the plug. When planting, one person drives the tractor, one person drops the seed or seedling into the plug and the other covers. For more Homegrown News subscribe to my newsletter!
Like or Tweet this article to a friend by clicking the badges below. Thank you for your support. Asparagus is a perennial crop that when planted, and maintained properly, can give decades of production. Planting asparagus is not a quick and easy task. It takes years to establish and many hours in the field watching over the tender plants. Asparagus isn't grown like normal seed or plant put into the ground. They grow from crowns and since they are a perennial crop, they generate growth year after year. This is how we build our beds...
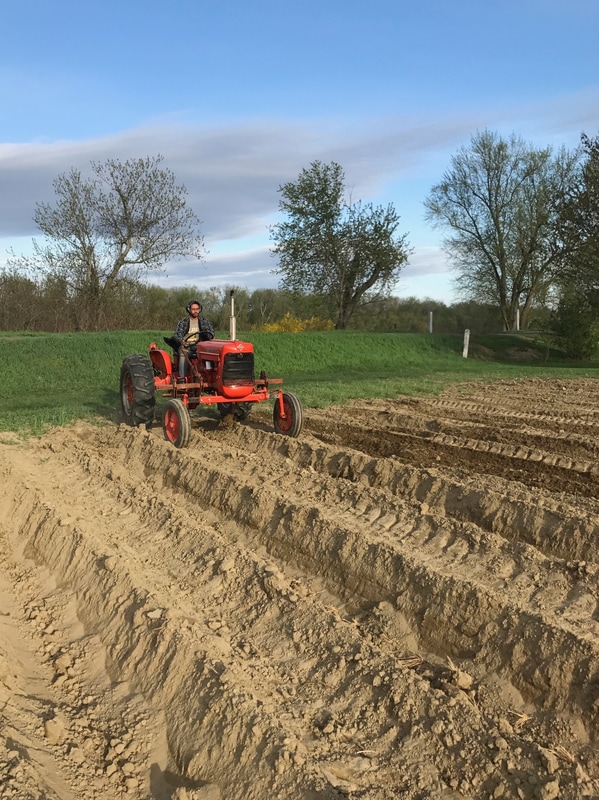
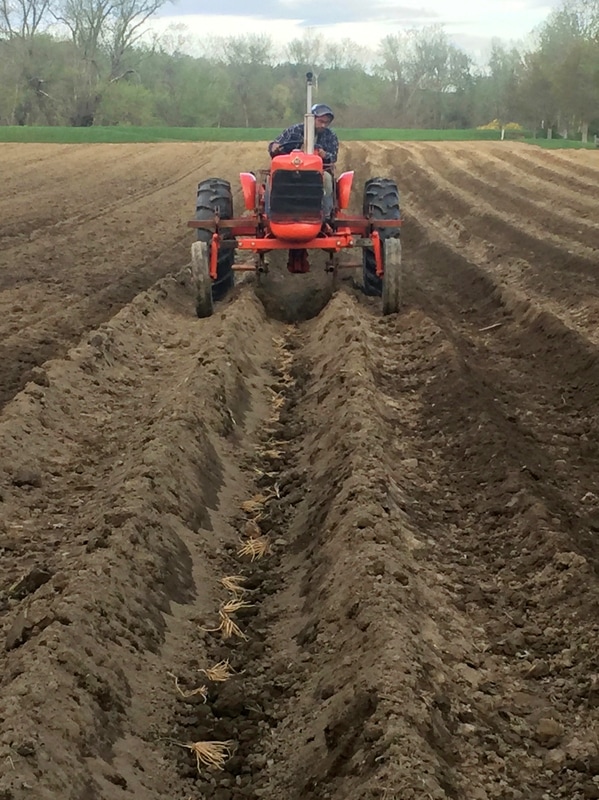
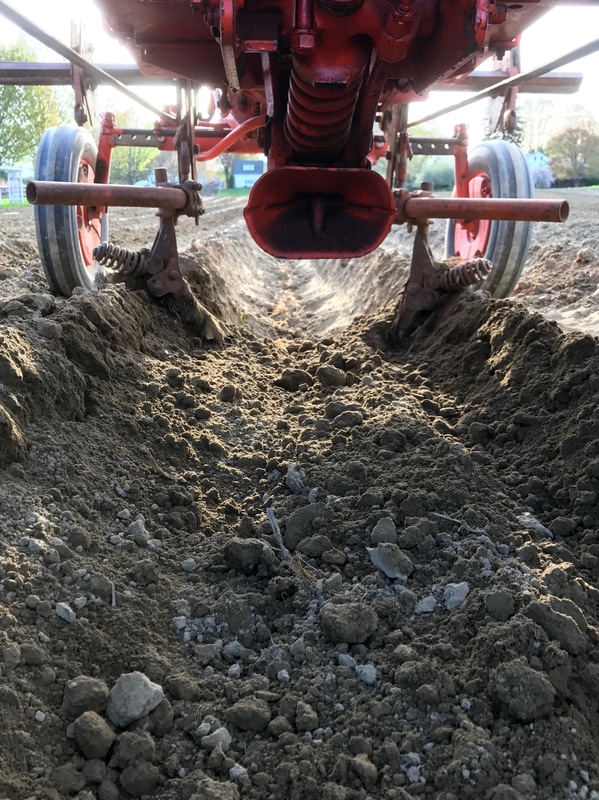
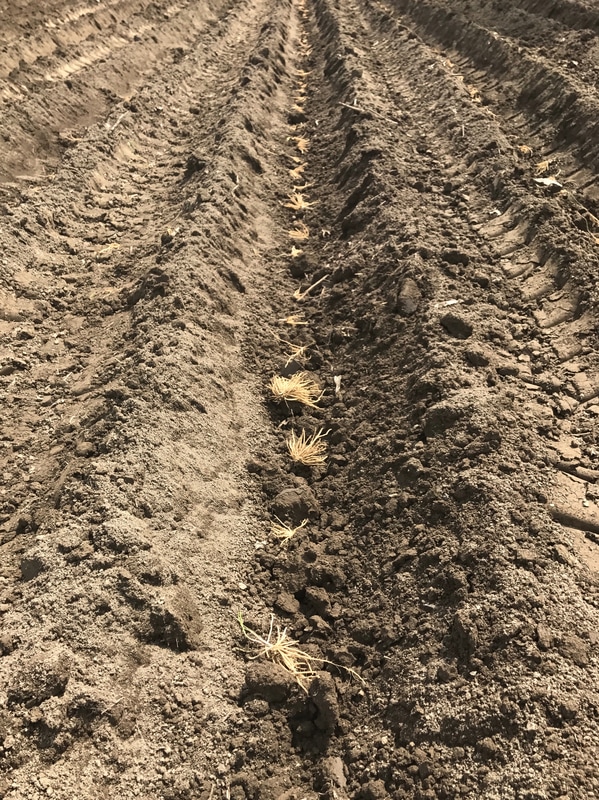
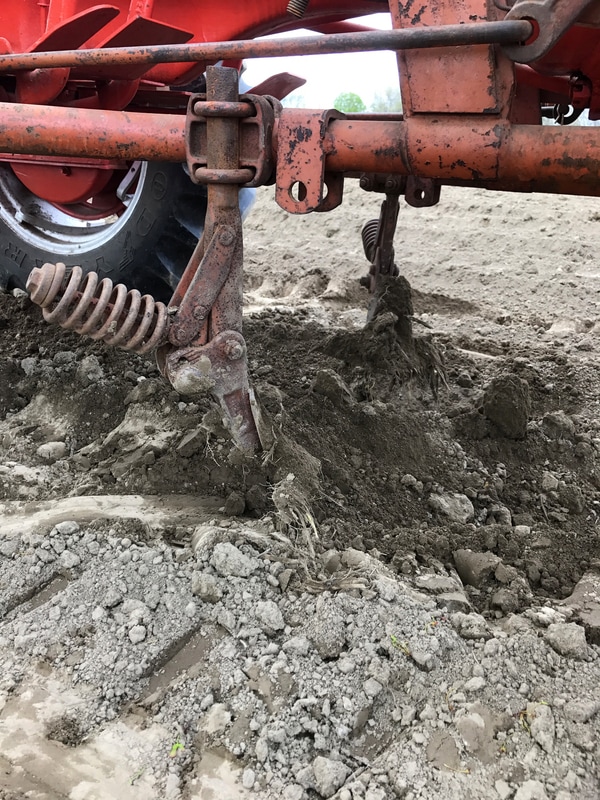
1. Grow the roots by seed: We decided to grow the roots ourselves instead of purchasing one year old roots already grown. It’s extra work and a lot of care, but it saves money. The only down side is that it adds an extra year to full production time. 2. Digging roots in the spring: If you remember, a few weeks ago, I posted to Instagram, the crew and I digging asparagus roots from a field to be planted. This was done by undercutting under the root system and pulling them up with a rake. It’s was a long, but fun process! 3. Next-up is prepping the field for planting. We did our normal subsoiling, plowing, and bed shaping of the field. The next step is a little out of the ordinary. We trenched rows for the asparagus crowns. It’s very important that asparagus is planted about 8 to 12” deep in the soil. This is accomplished by using a trencher, to dig deep furrows into the soil so we can lay roots into. 4. Planting the crowns: We space them about a foot or so apart, in the trenches, with the crowns facing up. 5. After we have the roots set in the ground they must be covered with about 1 to 2” of top soil. It is very important that you do not cover the roots with all the soil that was trenched-out for it will smother their growth. We mustered-up a new system with the cultivators and tractor to make the job a bit easier and more efficient. 6. Next we will fertilize and monitor pH, asparagus requires a pH of about 6.8 to 7.0. 7. After we receive a development of new asparagus ferns we have to slowly keep filling in the trenches as they grow until we are back up at an even ground level. This also helps with weed control as well. From this point, the process takes a good 4 years to see full production. The next time you are enjoying this favorite springtime crop you now know how much TLC goes into the creation of this plant. Please spread the word and thanks for listening! Related: For more Homegrown News subscribe to my newsletter! Like or Tweet this article to a friend by clicking the badges below. Thank you for your support. |
AboutFollow Bardwell Farm and all of our adventures here! Archives
April 2024
Categories
All
Gift CardsGive the gift of a CSA farm share or farmstand goods with gift certificate from Bardwell Farm! NewsletterSubscribe to Harry's Farmstand Monthly newsletter! |


 RSS Feed
DIRECTIONS |
|

|
©2022 BARDWELL FARM, ALL RIGHTS RESERVED
|